


 Reply With Quote
Very nice! hopefully these will be my next mod.


I purchased the Depo 04-05 JDM projector replicas for my 2002 SiR. Ive been driving with Philips Vision Plus halogen bulbs in my car for 2 years now and I was really looking forward to having a set of proper HID headlights with excellent light output and low glare. I couldnt find anything readily available so I decided to make my own custom set.
The retrofit on these headlights are extremely easy. As a pharmacist by training I have no mechanical training at all but I didnt really have any trouble. I was able to retro the projector with ease, and I'm sure everyone else can as well. The only tricky part was the wiring!
Step 1 - Open the lights
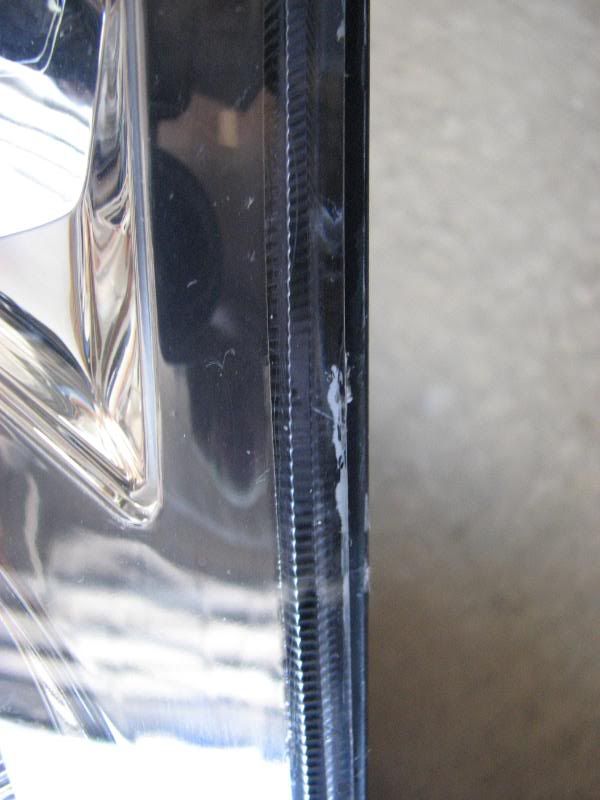
I used a heatgun to melt the glue. Go around the edge of the light in a slow and steady fashion and heat up the entire edge of the light. Use a flat head to pry the tabs and twist the screw driver slightly to break glue seal. Continue heating and use a gloved hand and screwdriver to carefully separate the glue and open the light. I started at the bottom as it was the least visible area. Take care to not get glue on the edge of the turn signal area as it is visible from the outside. Smeared glue can be removed with rubbing or isopropyl alcohol.
Original Depo Halogen projector, piece of crap.
Extraneous glue can be removed with isopropyl alcohol.
Step 2 - Remove the light assembly
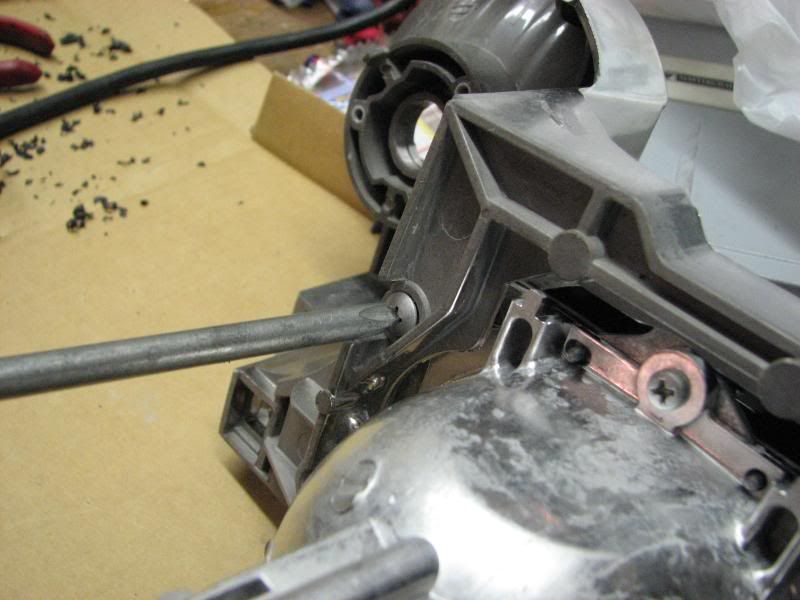
Using a 10mm socket, unscrew the 2 aiming bolts at the back of the headlight.
Headlight assembly removed from the light housing.
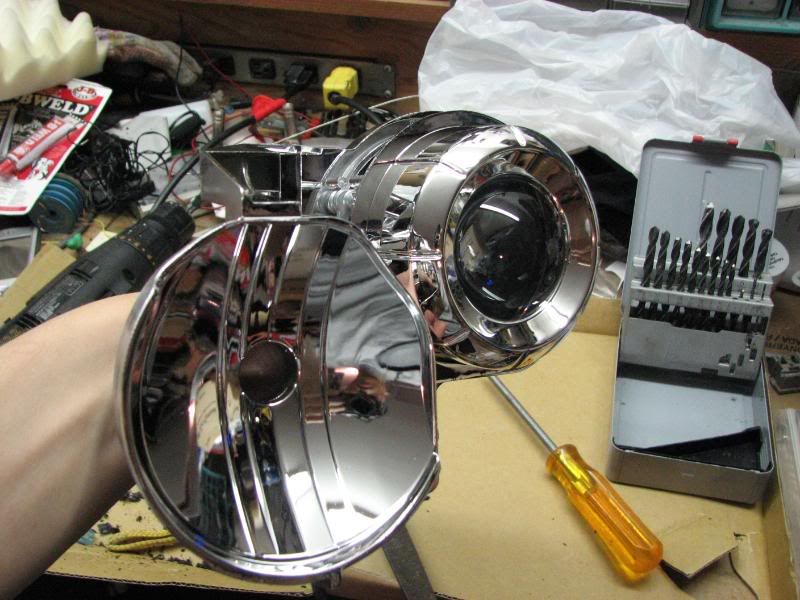
Remove 4 screws to free the projector from the bracket. Take care not to scratch the chrome shroud or the hi-beam reflector.
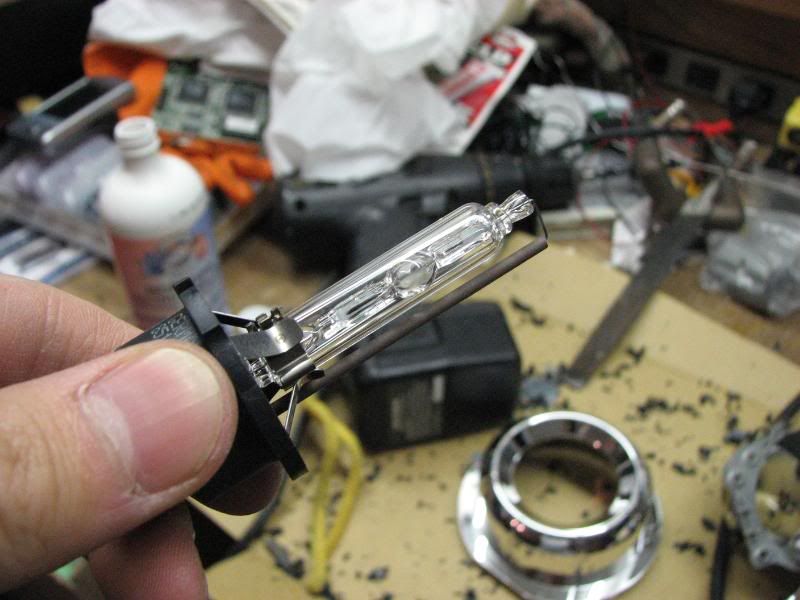
TSX OEM HID bulb. 4300K of bright daylight goodness.
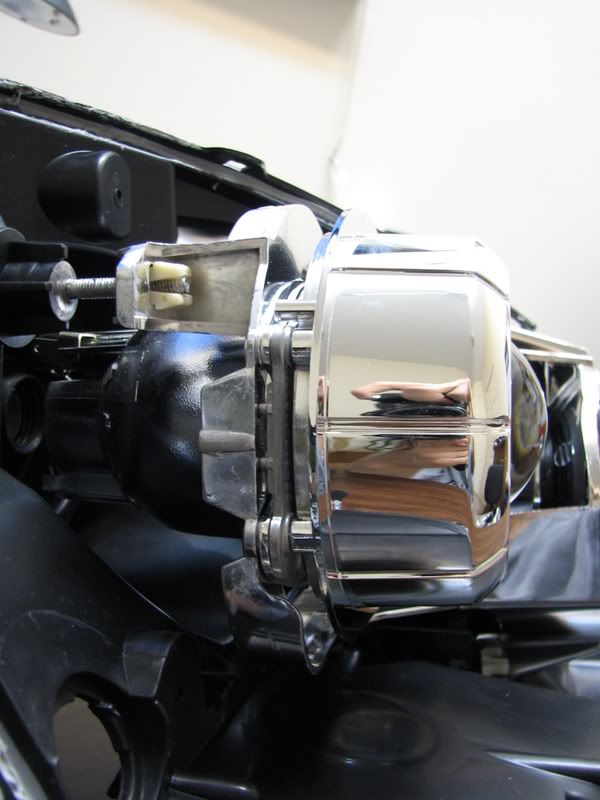
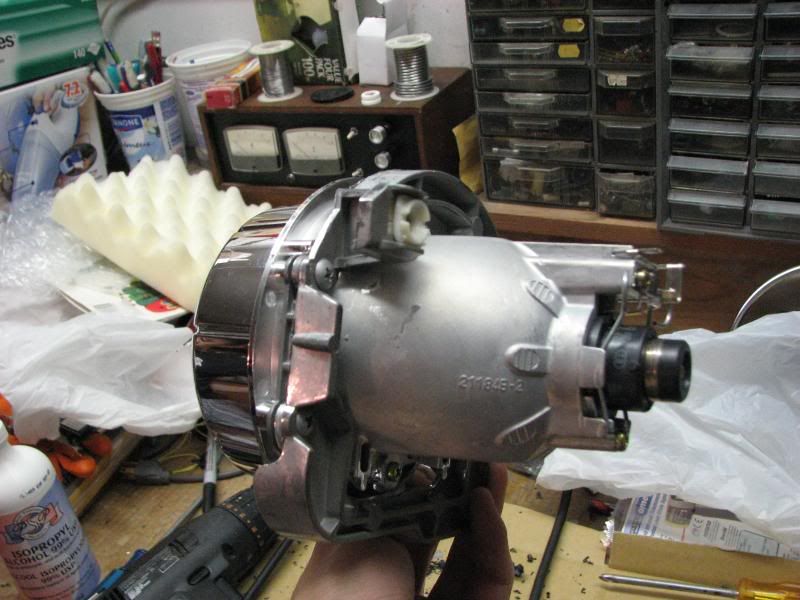
TSX projector mounted.
TSX projector HAS THE EXACT SAME DIMENSIONS AND MOUNTING POINTS AS THE DEPO PROJECTORS. NO CUTTING OR MODDING WAS NEEDED TO FIT THEM INTO THE LIGHTING BRACKET!!!
Very nice! hopefully these will be my next mod.
STEP 3 - Ballast
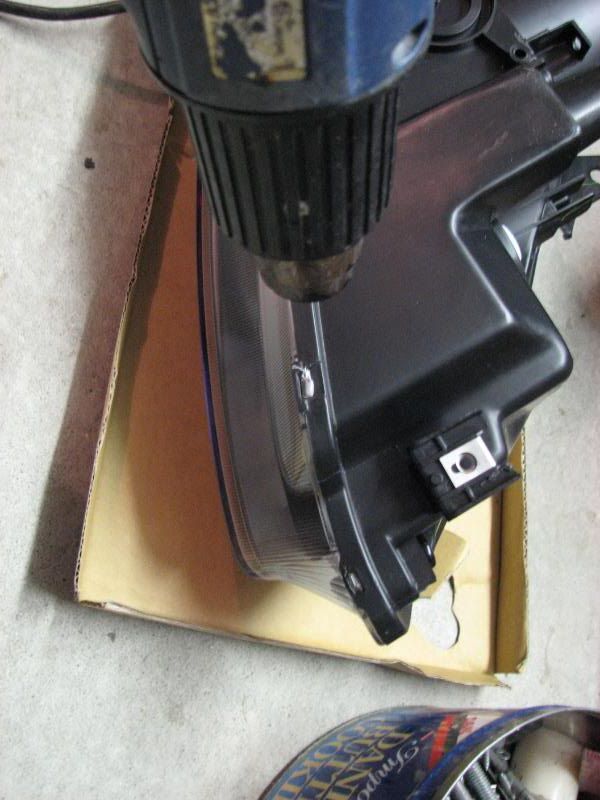
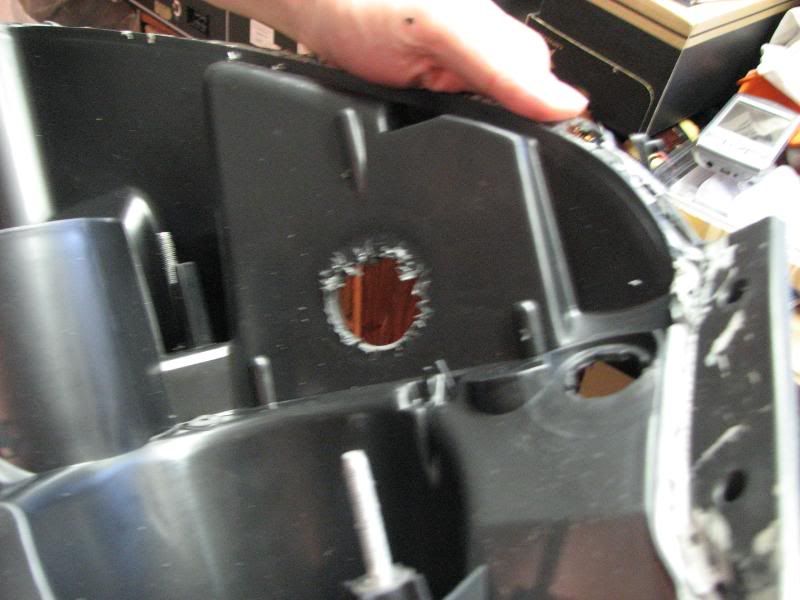
Before mounting the lighting bracket/assembly back onto the headlight housing, we must first create an opening for the ballast and ignitor wires that power the bulb.
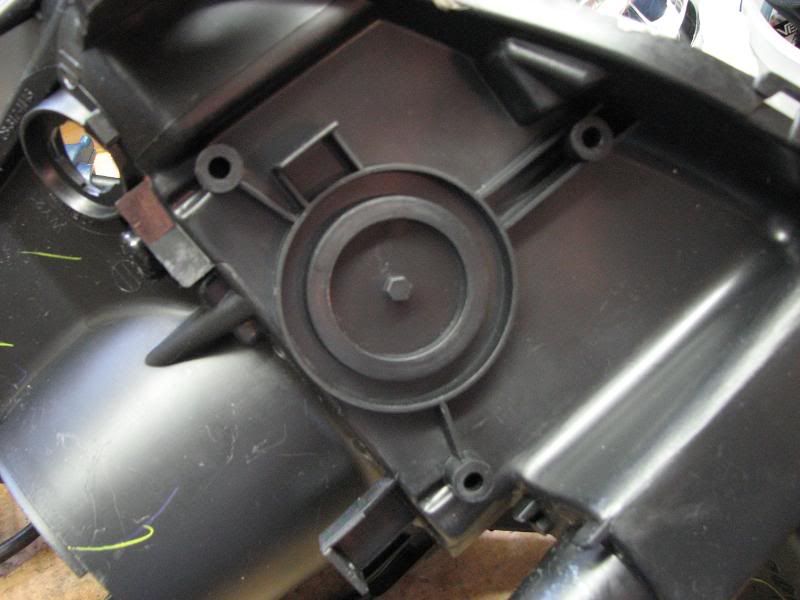
Bottom of the headlight. Note the circular depression and the three mounting holes that is designed to secure OEM Honda ballasts.
Drill out the hole and widen with a file. You could probably use a dremel to make a cut too.
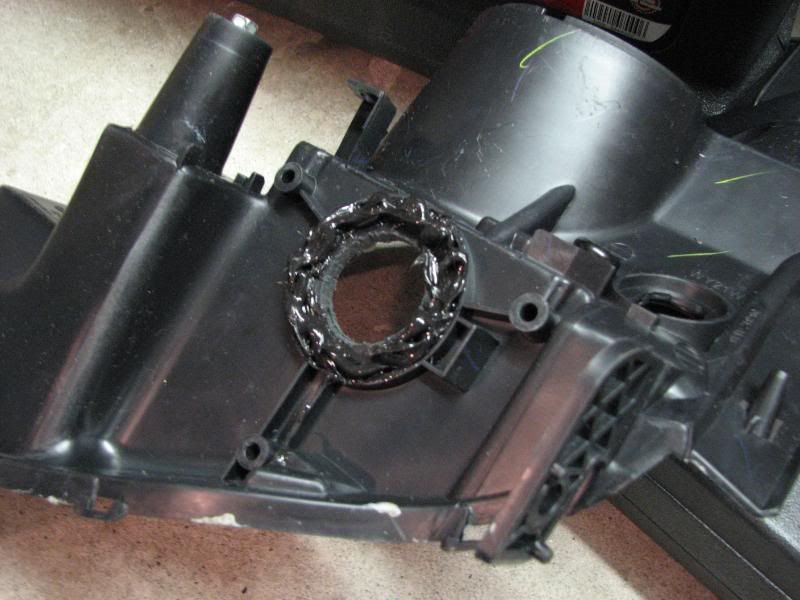
Created a waterproof seal with black silicone sealant. Place the OEM Honda ballast onto the light and bolt it down.
The silicon will seal the metal ballast housing to the bottom of the headlight and prevent moisture leaks. On the TSX, they have a rubber seal as well in the same location.
Widen the headlight housing at the rear to create room for the TSX ignitors. Remove the necessary plastic here. I sealed up this opening when I was finished with the bottom part of a yoghurt jar and sealed it with silicone.
Connect the ignitor to the ballast through the hole drilled out in the previous steps. Connect the ignitor and ground wire to the bulb and projector respectively. Replace the light assembly with TSX projectors mounted and bolt back into the housing.
Close up the headlight and use weight or elastics to keep the 2 halves together under pressure. Go around the edge of the light with a heatgun to soften the glue. Continue heating and close up the tabs. Use your hands to help coax the 2 halves of the headlight together and keep the glue soft and melty as you push the 2 halves together. Once you are satisfied with the seal, keep the elastics on while the glue cools and dries.
Honestly the wiring was tricky as hell. I used the harness supplied by Wayne from SSR, but his harness is designed for US cars. It just didnt play nice with my daytime running lights. It caused the dashboard DRLs indicator to stay on and it sent power to the HIDs and made them turn on as my DRLs. So i was driving around with HIDs on all the time.
Normally, the car uses the hi-beam lights at a reduced wattage as dimmer day time running lights.
In the end, my dad, who is a trained electrician, modified the harness. He wired the hibeams to the car's original hi-beam circuit, and cut the hibeam circuit from the HID harness. He then wired the low beam part of the harness to the cars low beam circuit.
Now it behaves like stock. DRLs = hibeams. Turn on the lights to low beam, HIDs on, hibeam turns off. Unfortunately the low beam no longer stays on with my hi-beams, which was the original design of the car. So no flashing hi-beams for me at night, as it'd cycle my HIDs too quickly and damage them
Ground point for the HID harness. Behind the driver's side headlight next to the radiator.
Harness draws power from the battery positive terminal. It's the little eye connector that I bolted down to the clamp. I replaced the 10W fuse with a 15W fuse as the 10W fuse fried.
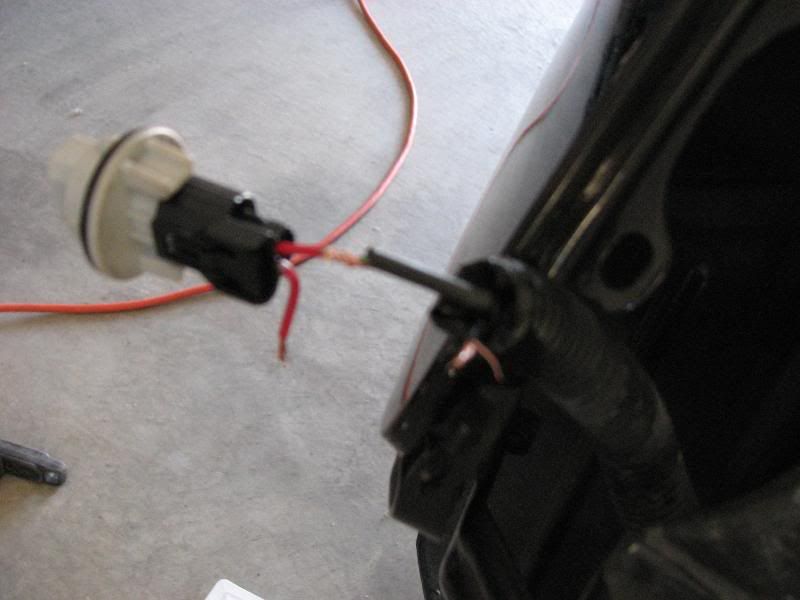
Turn signal sockets were cut and soldered to the new ones.
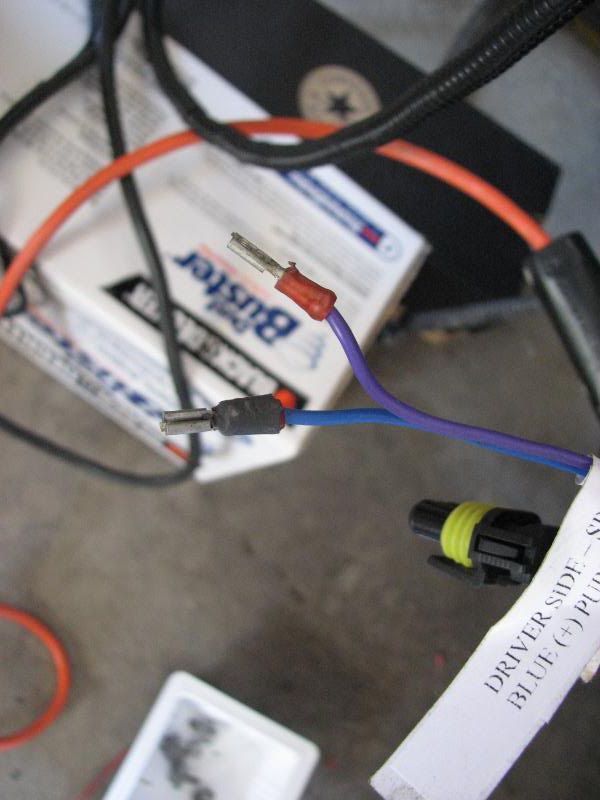
Note polarity of the HID connection wires.
OEM Honda/Acura TSX ballasts. Note the +/-, don't wire them up improperly!
Looks great even when turned off and parked
http://www.youtube.com/watch?v=sM6h12fVn6U
http://www.youtube.com/watch?v=RlKL_hJAUH4
http://www.youtube.com/watch?v=HKaKueNjHVE
Last edited by freelunch; 08-01-2008 at 11:40 AM.

very nice !
btw, you can buy the harness plug and pigtail directly from acura for the hid ballast.

very good DIY!!
even a finished up video, damn...
5 gold stars for you sir.

nice. another retrofitter.
Ed~

Nice..man

nice! I always wanted to know how hard it would be to swap the tsx projectors into the depo's looks like its a basic swap thats great news!
1967 Firebird. . . Yeah its alright
Legendary Ephatcher

nice man.. cutoff pix pleazze

Looks good buddy, sorry i couldnt be of any assistance to you.
The only thing i dont understand is how your DRLs dont turn on when you put the E-Brake down.. i have the same harness as you from Wayne and when i put down the E-Brake the highbeams turn on (not full power obviously)
We both have 02 SiRs too soo...
Need cutoff pics!

You got any pics of the horizon line?

well, if i ever have money for both of these things I will surely use your DIY
5 stars

i wonder if I put the headlight in the oven if I'll actually ruin the headlight.
I don't see though, how a heat gun can really work.... I don't have that kind of patience....
and is step 3 really necessary? Can't I just mounte the ballast externally, like every other aftermarket kit?
Last edited by Kerby; 07-25-2008 at 05:35 AM.

Originally Posted by Kerby

If you have an OEM kit won't it be smart just to mount them in an OEM location?
The mounting point is already there just do it
this is a great DIY I love the Depo lights i've had them for a few months now
I think this will be my next project looks great
NEED CUT OFF PIX!!!
There are currently 1 users browsing this thread. (0 members and 1 guests)
 Posting Permissions


Bookmarks