

 Reply With Quote
WOW
thats cool
thanks bro


This DIY is for EP3 front console only. Use at your own risk. I hold no responsibility for any damage to your car. This method hooks into your headlight fuse in the fuse box in the engine bay. This is the only way I knew how to do it. If you have a better 12v source or you want to run a switch to constant 12v then do it.
I glued some LEDs in my cup holder place to illuminate my yummy cold boba at night when it is all dark. I also would like to use this DIY to nominate myself for the Batman Arkham Assylum contest.
Let's get started.
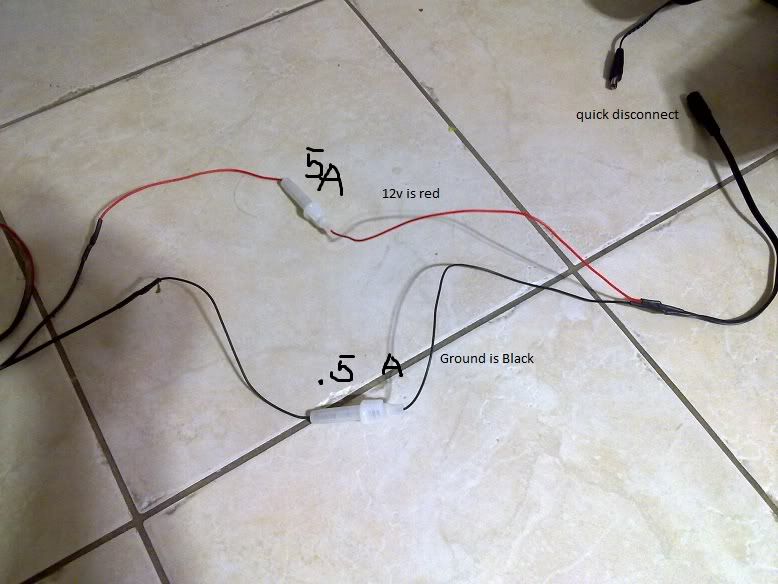
What I used? Ebay LEDs Orange color 130Degree illumination 5000mcd. 2x 56ohm resistors. Hot glue and solder. Thin plastic strips.(cut from a dvd case or something). .5A and 5A inline fuses. Speaker wires. zip ties.
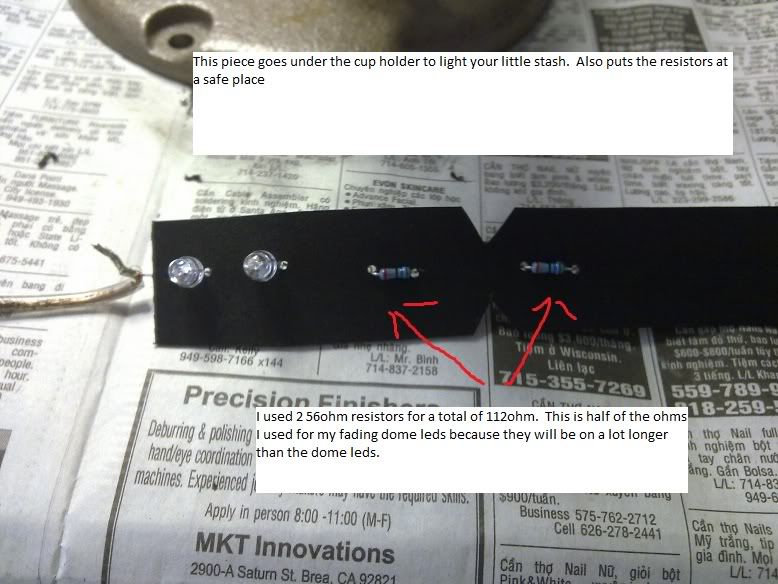
You can use any color LED but make sure you calculate them out. I used this calculator to calculate the resistance I needed for my dome light LED. Since I only used 56ohm for dome light LED I figure I would double the resistance because these LEDs would be on for a lot longer time than the dome light LEDs.
http://metku.net/index.html?sect=vie...calc/index_eng
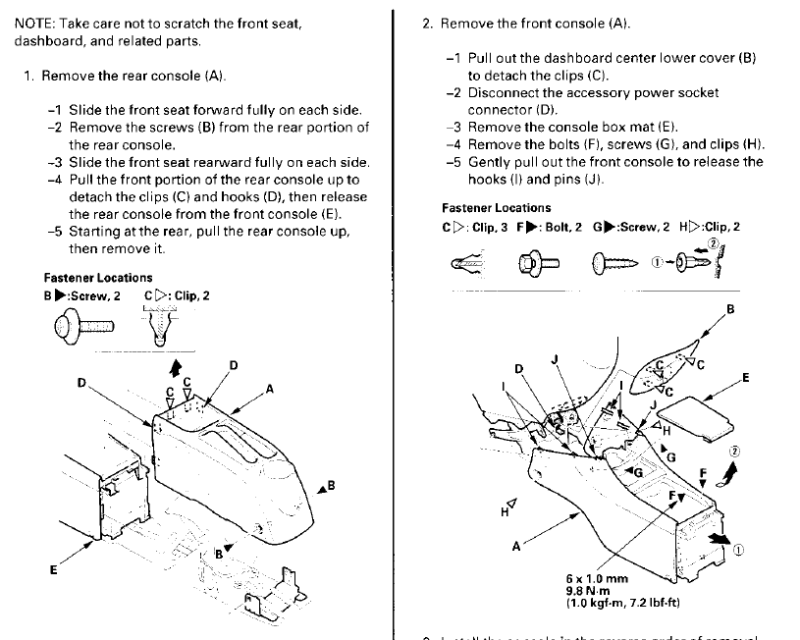
Remove the rear and front console.
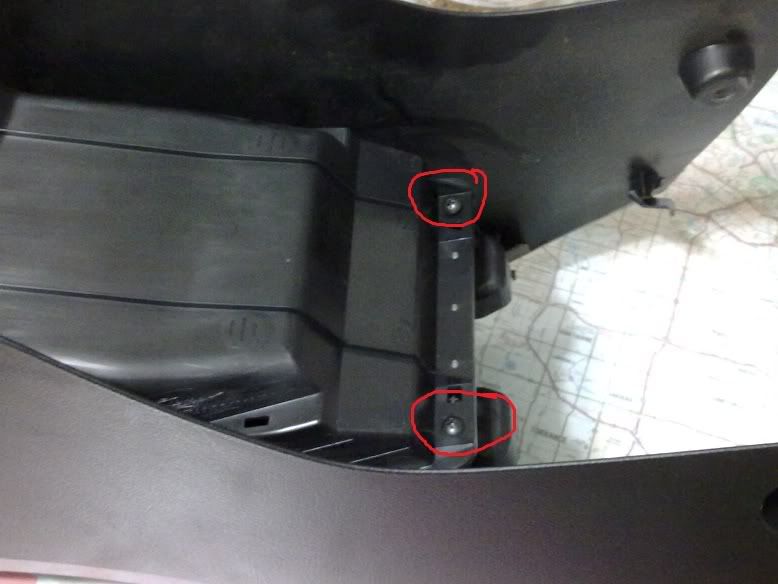
Take out these screws first.
Then these.
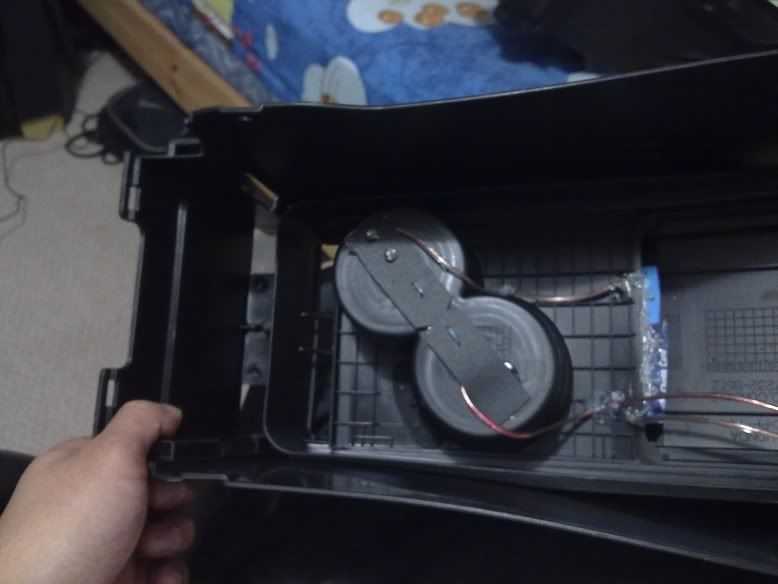
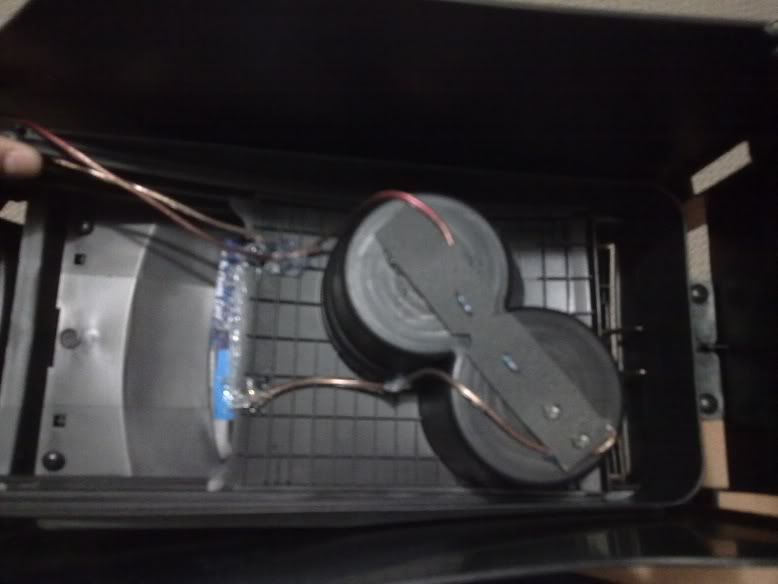
You can now slide out the cup holder. I found a good place to mount a row of LED is right at the rear of the cup holders where you can't see them. The leds would be bright enough to illuminate your drink at night, and since you can't see them they won't blind you or create annoying glow to attract cops.
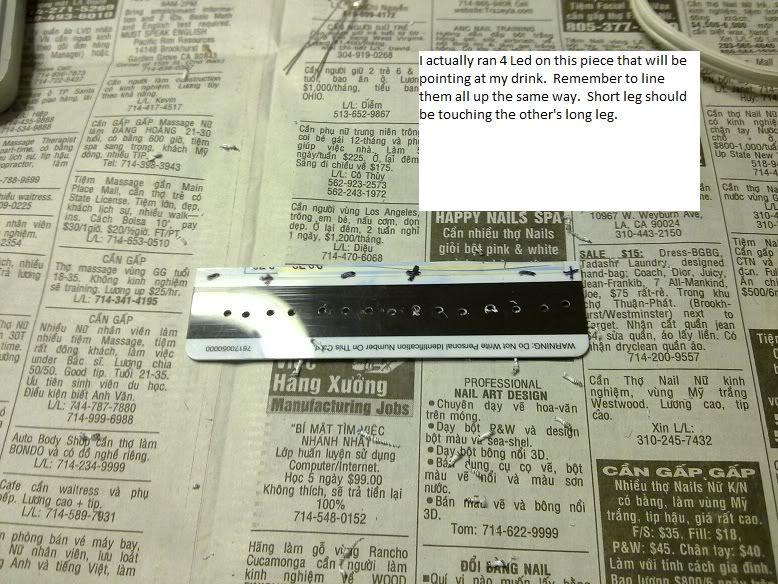
This is how I mount my 4 LEDs that will be shining my BOBA drink . I used an old credit card and cut it down to a thin strip to glue onto the cup holder. You can use any non conductor. You can even drill into the cupholder itself but I wouldn't do that.
This is the piece of the other 2 LED that will mount upside down under the cup holder itself. I also put the 2 resistors there. It'll be out of the way and safe from contact.
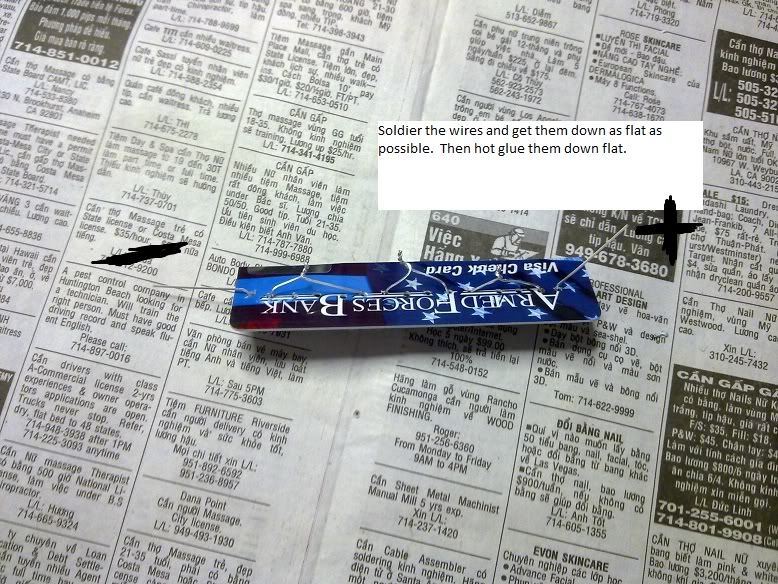
This is how I wired the 2 plastic strips. The credit card strip with 4 LEDs is mounted right behind the cup holder. It's actually not on top of the cupholder plastic but right behind it. If you mount the whole strip on top of the plastic it might be too bulky and hard to reinstall when sliding the cup holder back in.
Put the cup holder piece with the LED wires back in and reinstall the 2 screws you took out earlier.
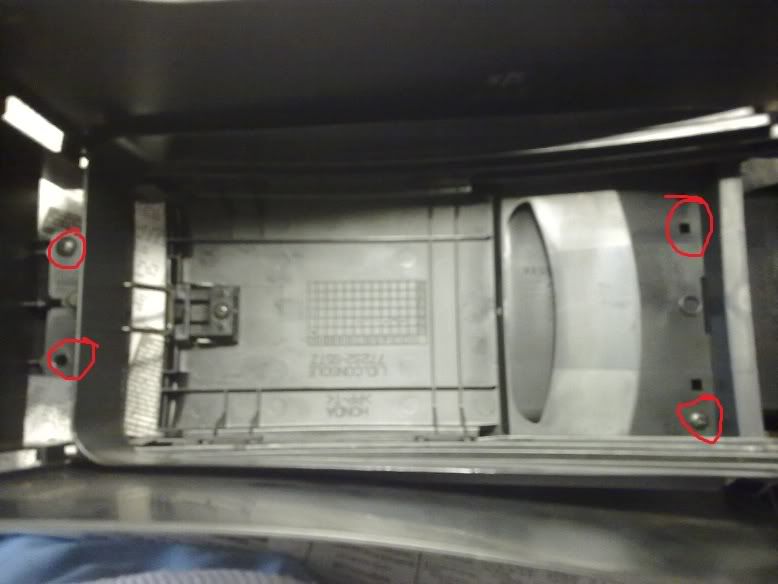
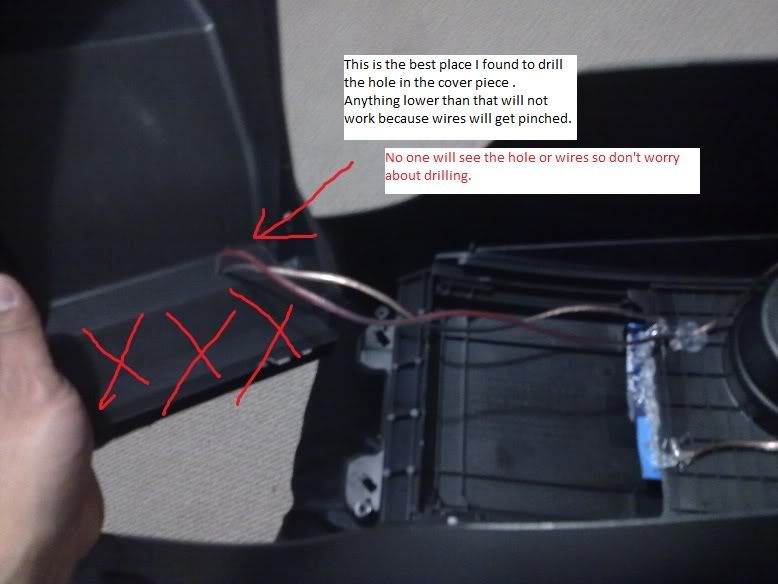
Now you have to put the bottom piece back on. (The piece that's actually the bottom of the front console. You can drill a hole anywhere except the XXXXX I crossed out. The best place would be where I point out. It would keep the wires hidden and out of the way.
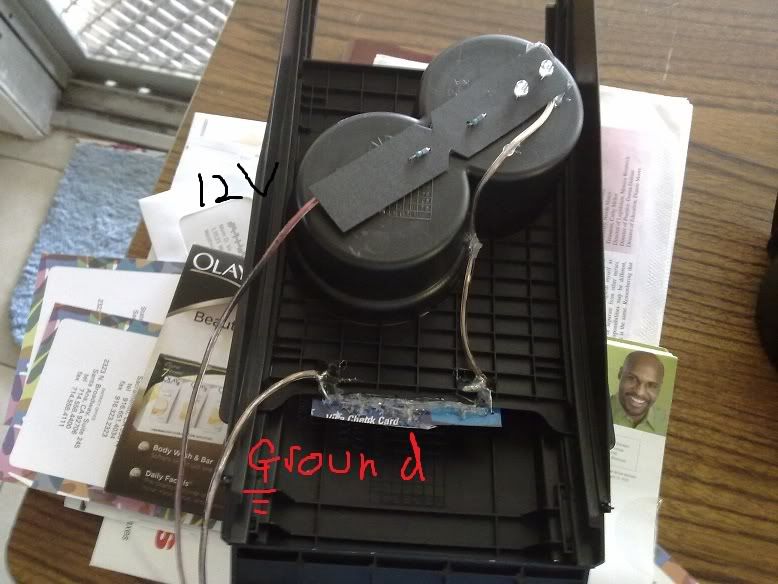
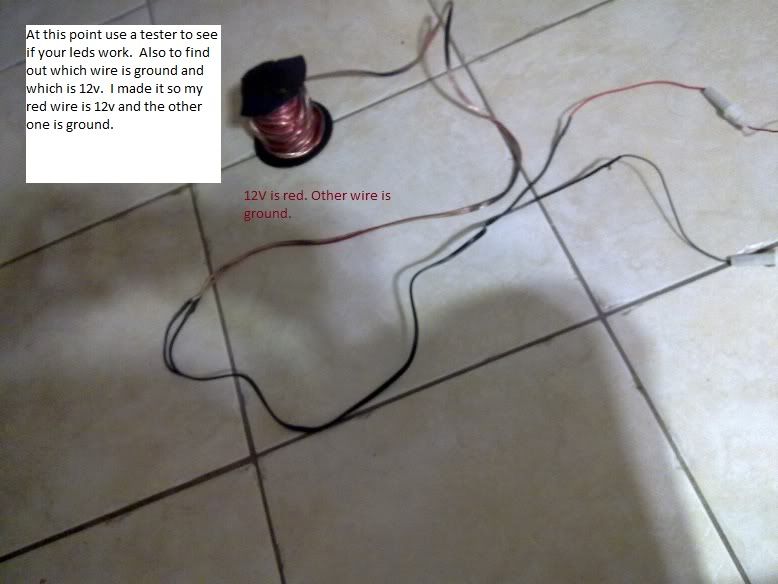
Reinstall all the screws in the center console and you should have the LEDs mounted with the wires sticking out in the front. Now's a good time to test them by connecting a 12v source. Also find out which wire needs 12v and which needs ground. I used something like this
http://www.iosss.com/shopping/images/66024c.jpg
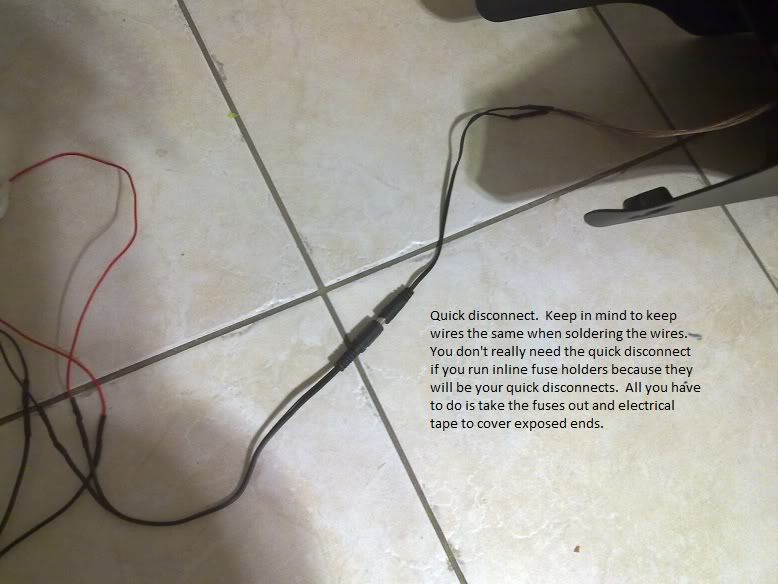
Now you can connect a quick disconnect. If you don't have one just add in inline fuse holders and they can work as your quick disconnects.
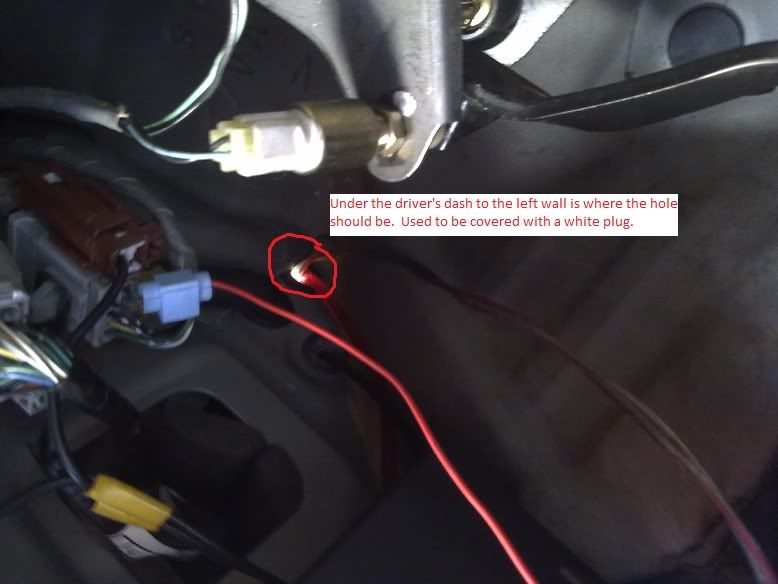
Now you can run your wire to the engine bay. Behind the driver kick panel to the top left is a white plastic plug. Knock that out and put a rubber grommet instead so you can run the wire through the fender.
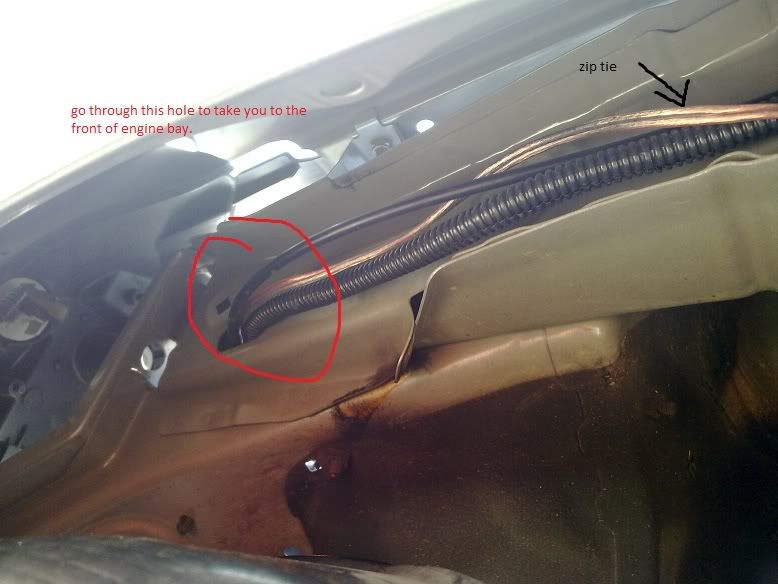
Take off the driver front wheel and the clips that hold the black plastic fender cover in place. Also take off the 3 phillip screws. The black plastic piece should drop down to review something like this. Run the wire on the top ledge and secure with zip ties.
The wire should come out in your engine bay. You can run the ground wire to any nut. I used an old nut that used to hold my airbox intake in place. (I took out the air box for a CAI)
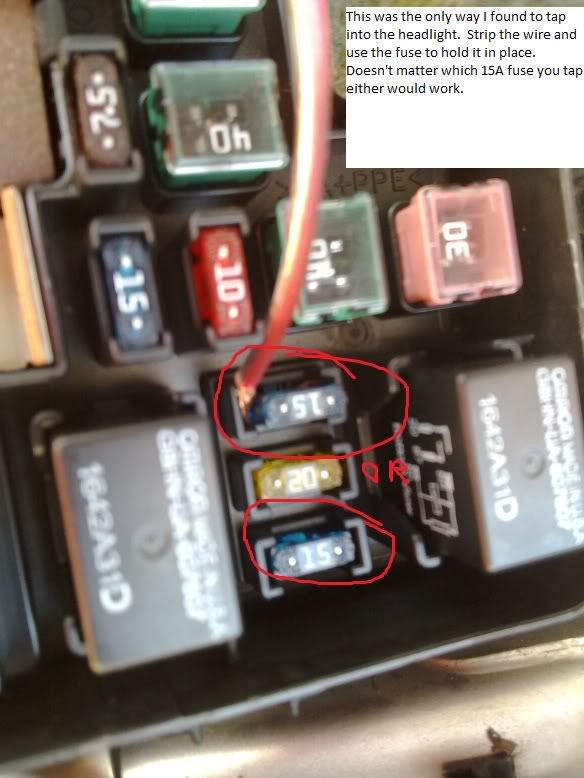
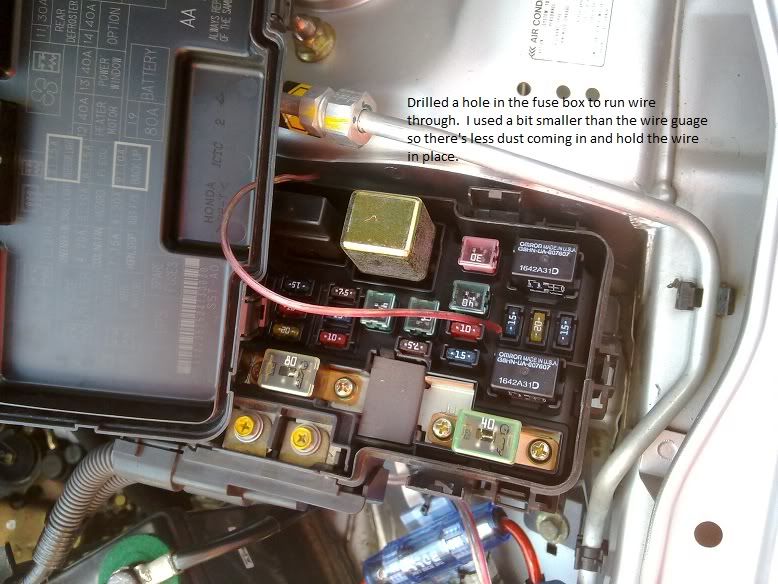
In the fuse box find the 15A fuse and use that as your 12v power source. What I did was I jammed the stripped wire in the fuse hole and used the fuse to jam it in place. Ghetto? Yes I know but if you have a better way of doing business then do it.
Drill a small hole just enough for the wire in the fuse box cover.
Now ziptie everything secure and you can put the fender cover back in place and wheel back. Back in the cab.
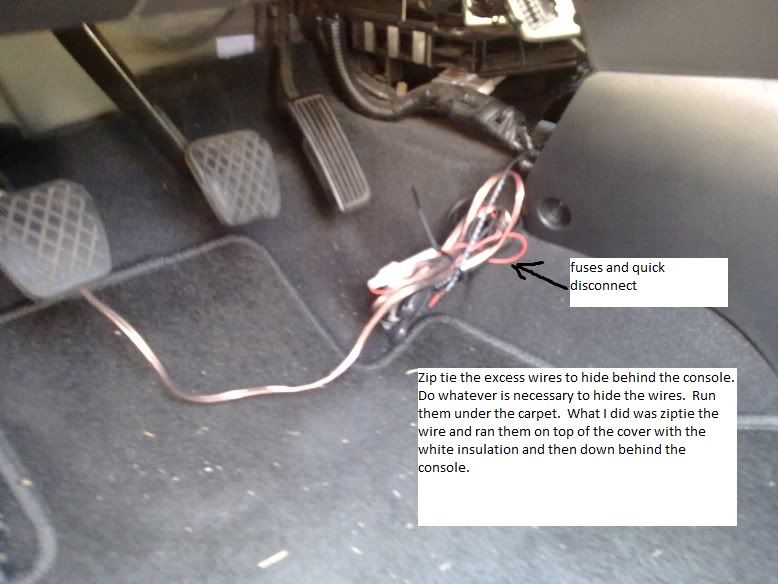
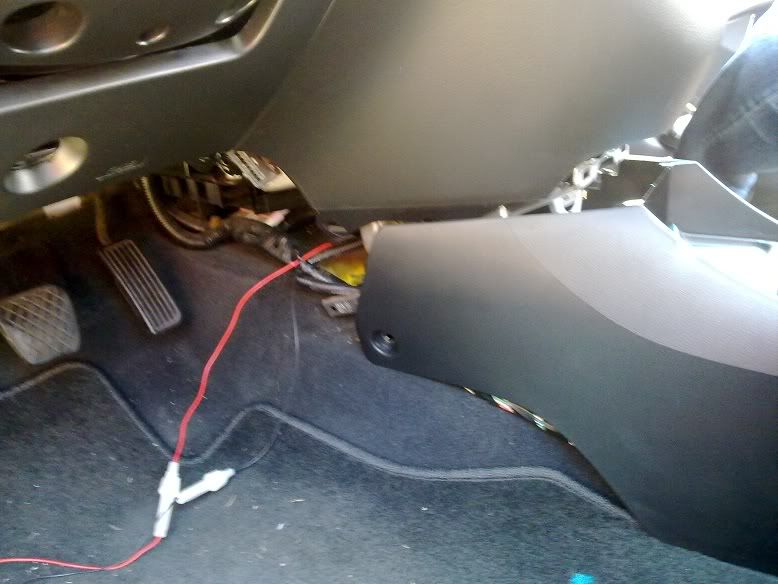
Reinstall the front and rear console. Run the wire like this.
Make sure you condense all the slacks and hide it. Tuck the wires anyway you like. I wrapped the quick disconnect into a bundle with extra slack and tucked it behind the cover . Also make sure you don't have any wires hanging out that keeps you from getting to the brake pedal and then be on the news for causing a wreck because you don't know how to stop your car.
I hide the fuses and ran the line using the panel under the dash. Use tape or ziptie to secure everything!
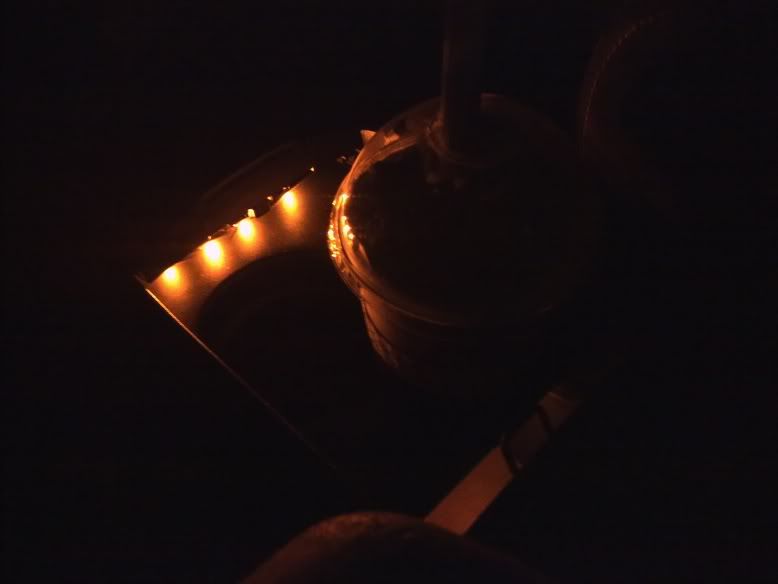
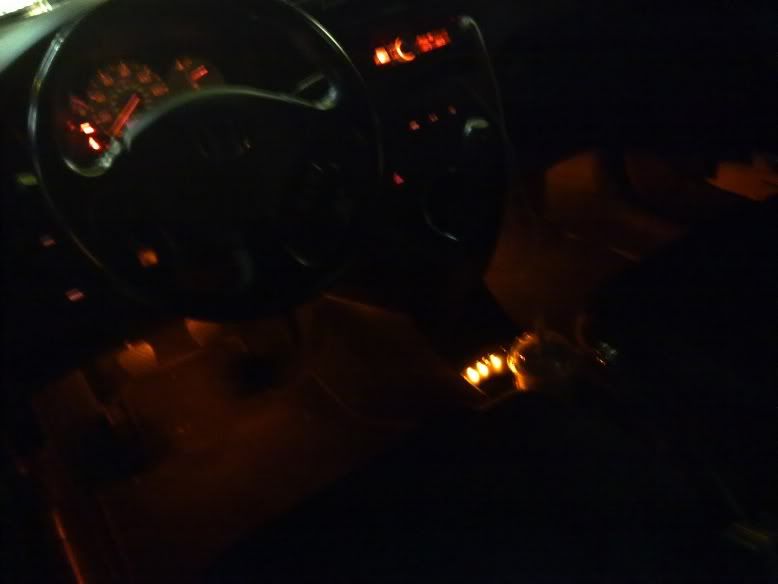
This is the final product with 5MP camera. It looks better in person.
Please don't flame my DIY. I havn't played Arkham Asyllum yet and would like to.
Last edited by ttttrigg3r; 04-28-2010 at 05:01 PM.

WOW
thats cool
thanks bro

That's a very detailed DYI. Looks interesting.
Kinda disappointed in the speaker wire and just plugging into he top of a fuse.
Theirs a bunch of people n her that could tell you what wire you could have tapped into under the dash.

Its not blinding at all ? I like it.....just worried about brightness.
I asked around but even chad didn't know where to tap in. I was in a hurry because I really want to play Batman in jail. No it's not blinding at all because the LEDs themselves are hidden. The light only points traight to the drink. Speaker wire was all I had because I really don't know what wire gauge I should run.
Nice work. I done with my dem light already. so you want to only have the led light on when you have at least low beam on or on all the time? There a way to go around without going to your engine bay. Let say if you want it on when you turn on your low beam and you have fog light. You can just put toget at the inlet and outlet of the fog light. If you dont, you can get the constant 12v from the fog light plug but I will try to figure out where the low beam ground at.
Yeah I figured I only wanted them on at night so I wired them to headlights. if you have a better location for a 12v tap let me know and I'll redo the wiring. It's been 3 weeks and the lights still run fine. I do not have fogs though so I don't know what you're talking about when you talk about fog light plug.

Kudos on the quick disconnect and gratuitous fusing.... Too many people wire a car and forget that someday they may just want to take it back apart again....
I REALLY need to hit the service manual and find you the sidemarker feed.... been busy with other shit unfortunately. I'm doing some fog lamp work soon so will be under the dash big time.
Made with bits of real panther, so you know it's good.
Is it just me or did some of the pictures get repeated? I swear it was right just yesterday. And I didn't do anything to my photobucket.
Fixed everything. hope it stays fixed. iono wtf is wrong with photobucket. can't wait to play batman..
Thanks ahead Chad.
Last edited by ttttrigg3r; 04-28-2010 at 05:02 PM.

Ill look where I tapped into my boost gauge. it was one of the emergency light switch wires, and it only lights whenever I turn on my lights. I'll Take a picture of it tomorrow.

This is a great write-up! Keep it up!

Nice, but if it was me, i would go wit white LED :)
Bump for answers or pics.

You could tap into the red/black wire behind the fuse box for the positive parking light wire. Nice DIY too
There are currently 1 users browsing this thread. (0 members and 1 guests)
 Posting Permissions


Bookmarks