


 Reply With Quote
Post pics of the parts not installed. Wouldnt hurt to throw up some part numbers as well.


parts just came in today
This topic has been been beaten like a dead horse, but to recap: apparently certain parts in the 05-06 RSX-S are exactly the parts that are used in the DC5-R.
FedEx guy just dropped all the parts today. WEEEE!
what they are:
DC5 ITR Aluminum Floor bar
DC5 ITR Rear Strut Brace
06 RSX-S LR and RR Strut Gusset
06 RSX-S Front Subframe Brace
I'll post pics once I'm done
Last edited by kprocivic; 10-15-2008 at 04:31 PM.

Post pics of the parts not installed. Wouldnt hurt to throw up some part numbers as well.
ALL advice issued with this "Disclaimer"
Tim "the Toolman" Taylor is my HERO ! ! !
"Labor Unions are Domestic Terrorist orgainizations"

nice! i installed the front subframe brace recently. i felt more of an improvement compared to adding a front strut tower bar.
GL with that Aluminum Floor Brace. it's a bitch and a half.
Green Crew #7
Please donate and support EPHatch.com: Greenie Status, License Plate Frames, Banner & Small 'ephatch.com' Decals
Was your WTS/WTT/WTB closed? Please read the following: link 1 & link 2
The B-pillar floor bar is already installed. But I'm to uninstall it later and take pics so you guys can see the difference and the mounting points.
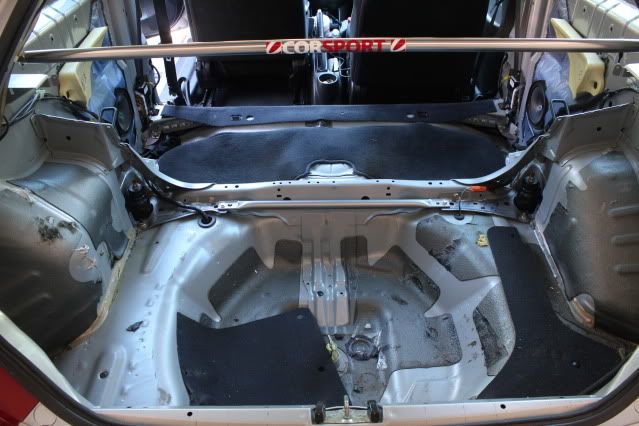
I had to basically gut the whole hatch area to get to the OEM one. What a PITA!
Okay... lets get this show on the road.
I have only done the rear strut bracing. We having a freakin heat wave in the Northeast and it just got to hot. Even though I was in the garage... the call of a ice cold Corona Extra in one hand, the TV remote on the other, and my balls dangling in front of a fan were just calling into the house.
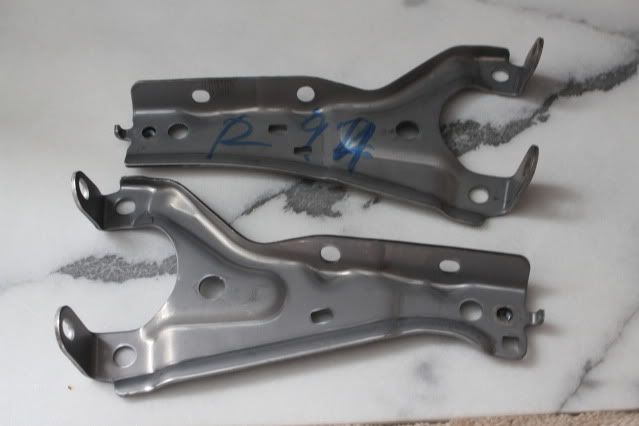
Gussets:
The unique and rather interesting characteristic of the gusset design is that it is not only the means by which both struts are joined, but also that it is bolted to the chassis. The gussets are bolted on at (3) points.
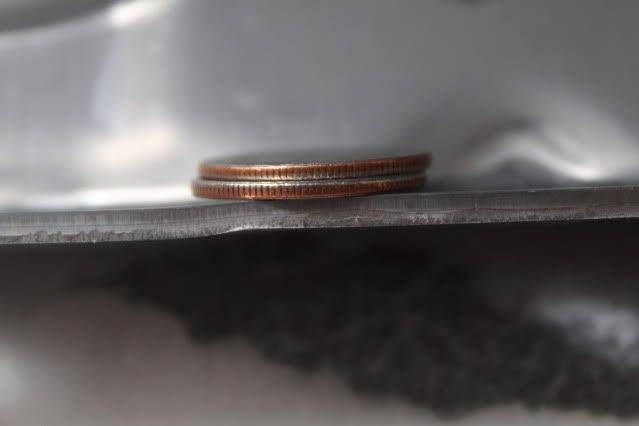
The gussets are thicker than (2) quarters. Pretty thick stuff.
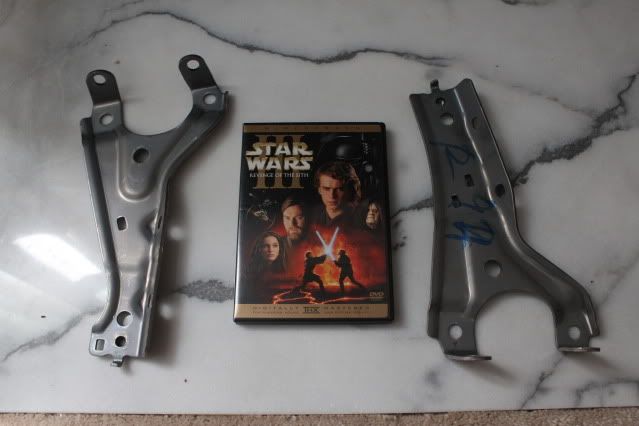
Their size is bigger than a DVD box
And yes, once I'm done posting this... i am going to watch EP3 of Star Wars.
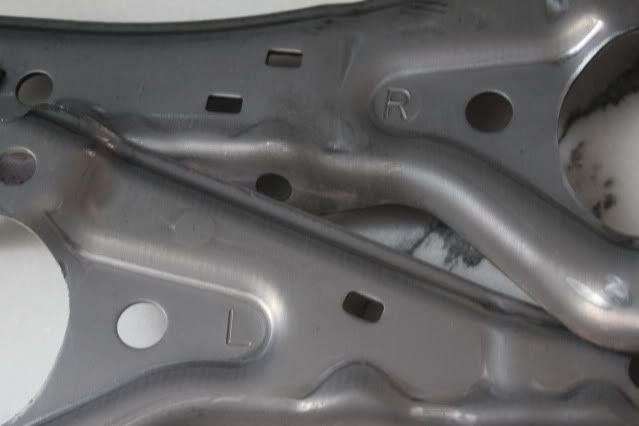
Honda was even thinking made these gussets idiot proof. On the back they have kindly stamped the side where they are installed.
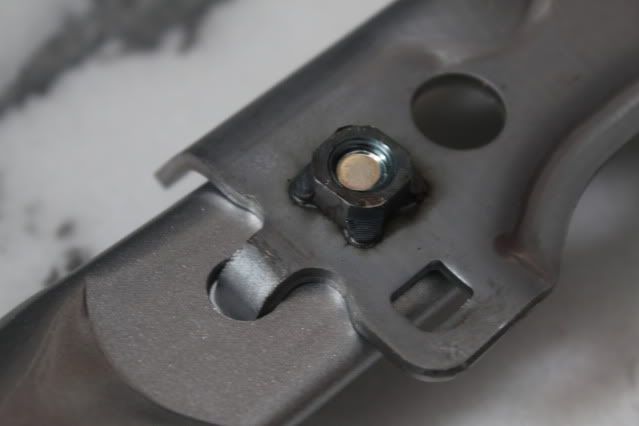
The means as to which the gussets are connected are by a hollow bar. The thickness of the bar is approximatly the size of a US$ quarter. Each end of the bar has two holes. The outer hole is where the bolt is placed to attach it to the gusset, and the second hole is used as support.
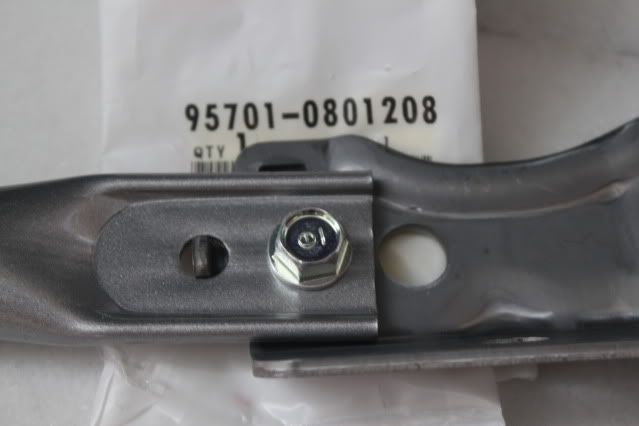
When you order this part, you will need to purchase (2) new bolts. Don't worry, i have supplied below the needed part number.
Notice the top knotch welding work on the threaded part
Now to the installation: Its pretty self explanatory... if Project Yellow can do it... anybody can do it.j/k you know i love you.
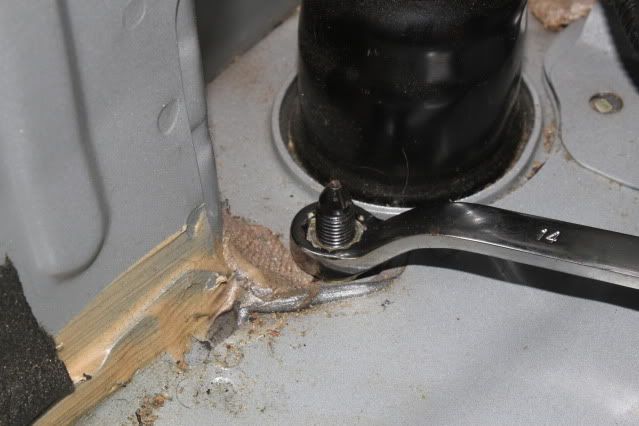
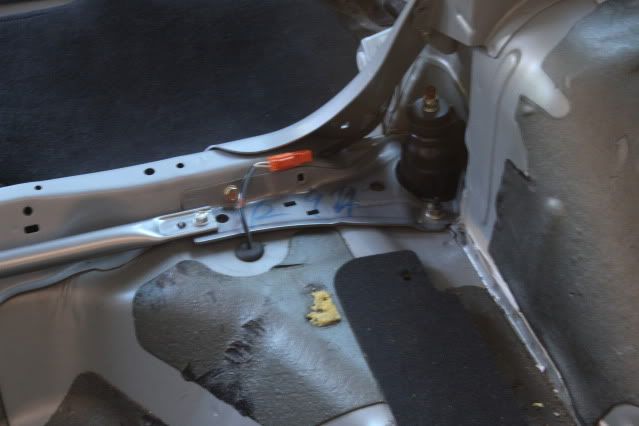
Use a 14mm socket to remove the bolt on the strut
Now, the bolt facing the rear of the hatch will be easy to get too. The other is hiding behind another gusset where the rear back seat is. To get to it, I just removed the (3) or (4) 10mm bolts.
Before you install, you will have to remove the two wire holders on either side of the hatch.
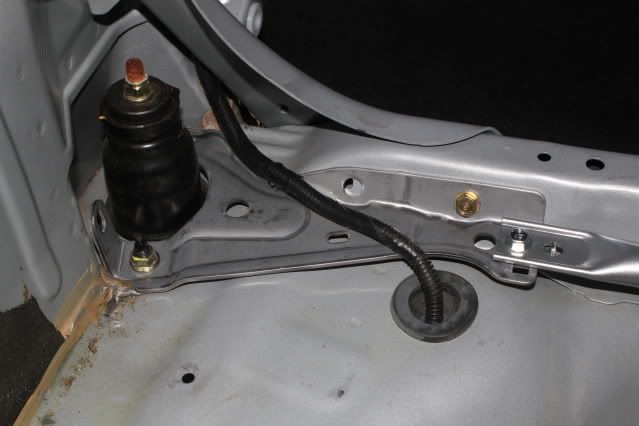
Remember in the beginning I talked about how these gussets have (3) bolting points? The strut has (2), the other when you install it will be easy to find. It might be different in your case, but in mine i didnt have the bolt for the (3) location. Because i am going the gutted look, i've already removed my rear seats, so I just took a bolt of the support and used it. Fit perfectly.
[insert location of bolt I used]
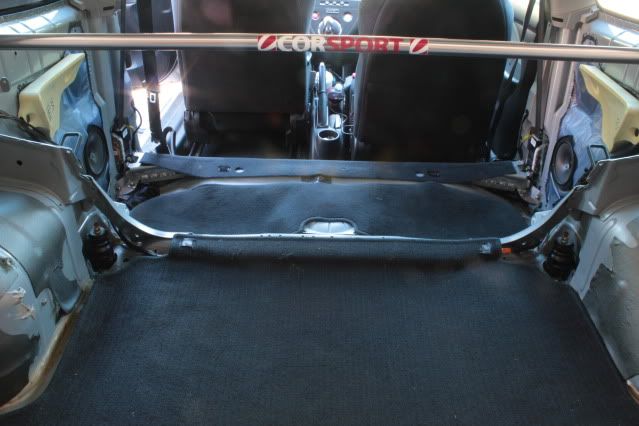
Last piece to install is the bar. Should look like this:
Tighten everything down. Don't forget to install back the gussets you removed to get access to the strut bolt. Finally it should look like this:
Put the carpet back in, and gave at your final product: [/b]DC5R rear stut bar assembly[/b]
Parts required: (I purchased the RSX parts from Carland Acura. Cheapest place I found.
74671-S6M-J00 - Right Rear Gusset - 05-06 RSX-S $16.71
74672-S6M-J00 - Left Rear Gusset - 05-06 RSX-S $16.71
95701-08012-08 - Bolt, Flange : you’ll need (2) $1.30 for both
From JDMland.com:
JDM DC5 Type R rear strut bar $89.99


Nice!
I think corsport needs to make a type-r strut bar for less than 90 bux... ;-)

Awesome, awesome write up dude, cant wait to see the rest! I plan on getting the rear bar aswell, but Im going to weld around the joints from the bar to the gussets for extra rigidity :)
You could have gotten that rear bar at a fraction of the cost though....
http://cgi.ebay.com/ebaymotors/JDM-I...#ht_3719wt_732
pics dont work :(

That's where I bought mine.Originally Posted by SHG_EasyE

Nice info, Kirby.
More reading:http://forums.clubep3.com/showthread.php?t=676396
Last edited by Hasbro; 06-20-2010 at 11:14 AM.

wow great write up. how's it feel? that's a ton of work for a bar install. cheap price makes it super appealing though
tell me how that goes. After do you weld up yours, mind hooking me up? I'll throw you some beans for helping.
As for the bar, i was thinking about buying it from there... but I don't trust ebay. I've heard too many bad experiences. So i went with the tried and true. i knew if I bought from ICB i was going to get it.
Some people are using liquid nails or something of that nature... kind too messy for my taste. Plus i'm always thinking ahead, and if i decided to remove it, it would be a PITA.
That's where I got the idea, but there wasn't a step by step or a good explanation on how to install it. I thought it would help out the ephatchers by doing a How-to, and explaining why the parts should be installed..
With the c-pillar, b-pillar floor bar, and the HFP suspension it feels really good. You really feel it in the turns.
plus the OEM-ness of it doesn't make it look cheap or cheesey... it looks like it belongs on the car.
Last edited by Kerby; 06-20-2010 at 06:16 PM.

Ill be doing this tommarow as well as the ctr rear sway and itr front subframe brace, hopefully since every single time I work on my car shit goes wrong lol. Currently stuck removing the rear seats, pretty sure I need to remove the 2 bolt underneath that plastic cover at the base were the seats fold and im done with that step, but idk theres no more write up for removing the rears anymore so im shooting in the dark.
im doing this, cheap and oem, yay!

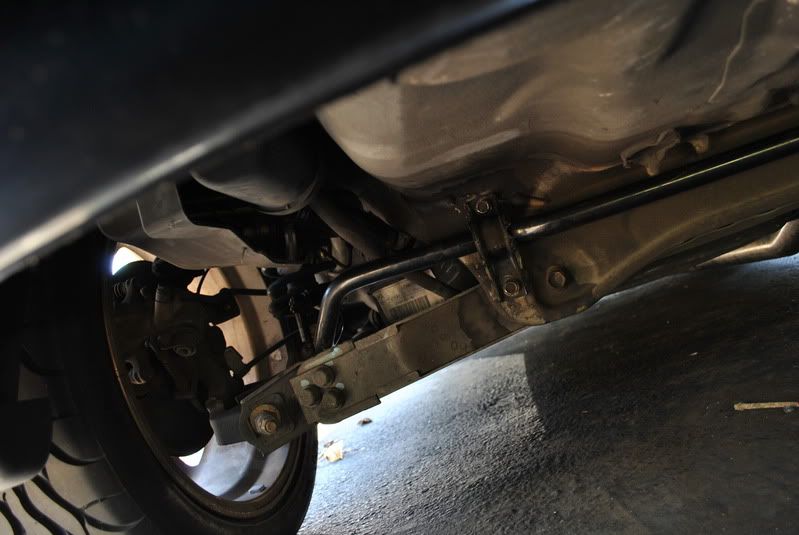
In the DC5-R the tabs at the back bolt to the wheelwell, so actually with some spacers you'd have it attached at 5 points..
if this 1st image is BIG then youll have to clear your cookies I resized it on photobucket after I posted sorry.
only problem is the itr rear sway kinda touches the on the left side
Havint tryed it out yet I had to drive home with everything im my hatch bouncing around. Took me 9 hours to remove the rear seats, and exchange the rearsway, floorbrace, front sub brace and throw in the new rear strut tower brace. That front brace was a bitch,.. maby without a turbo sitting on top of it it would have been more easy. Also the rear strut tower bolts were previously over torqued so i bolted the gaussets on top of the other bolts. After I finished last night my battery took a dump from the lights being on and had to wait till morning to get a new one cause it wouldint jump.
There are currently 1 users browsing this thread. (0 members and 1 guests)
 Posting Permissions


Bookmarks