


TORQUE SPECS ACCORDING TO THE MANUAL
green circles 116 ft-lb
yellow circles 33 ft-lb
tie rod nut 32 ft-lb
rear strut bolt 45 ft-lb
top rear strut nuts 43 ft-lb
ORDER A-SPEC KIT HERE: A-SPEC A-SPEC A-SPEC
PARTS AND PART NUMBERS YOU WILL NEED
NOTE: DEPENDING ON WHERE YOU GET YOUR PARTS FROM, BE AWARE OF THE QUANTITY OF EACH ITEM
2x 90301-S5A-003 (These are the nuts that secure the tie rod placement and where you adjust the toe)
2x 53541-S7A-003 (These are the tie rod ends, also, the ones used for the Honda Element are the exact same ones)
1x 94201-30220 (These are the pins, there's many of them in 1 bag, all you need is one bag)
2x 94030-12280 (These are the nuts that thread on to the tie rod end to hold them on to the strut, mine came as a pack of 2 so the item quantity I ordered was just 1)
THIS SHOULD ELIMINATE ANY CONFUSION.. YOUR CHECKOUT CART SHOULD LOOK LIKE THIS (PINS ARE $0.14 SO GET SOME EXTRA)
OPTIONAL***
This install requires shaving down the bushings on the rear struts (see further down) but if you would like to press out the old bushings and press in ones that fit the ep3 properly, you will need 2 of these.. Part number is 52622-S5A-004
NOTE: This is OPTIONAL. If you have the available resources then I say go for it. It will add about $20 to the parts list, and i'd imagine you would have to find a shop locally that would be able to do it, but for those that are 'scared' to grind down the rears, here is your alternative.
Some other recommendations.. Any penetrating oil to help break loose bolts and nuts
SPRAY DOWN EVERYTHING!
FRONT
1.
-Start by loosening the lug nut bolts and jacking up your car, take the wheel off and pop the hood.
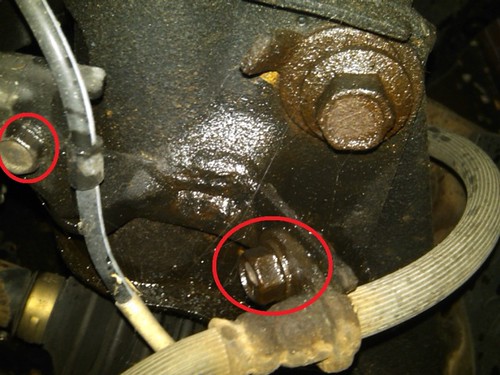
-Take off the bolts and brackets that hold on the brake and ABS line (Red Circles)
-Then, 'LOOSEN/BREAK FREE', do not completely take off the 2 big bolts that hold the knuckle on to the strut. (Green Circles)
-Go up under the hood and break loose the top 3 nuts on the strut tower (Yellow Circles)
-I do suggest going in this order, trying to break loose the 2 big bolts that hold the strut on to the knuckle can be tough, having the strut secure in the tower gives a good platform to give it some muscle. Also, this makes sure the axle wont pop out. This DOES happen, and it IS a pain to correct. I recommend using zip ties, like this..
-Now, with everything loose but still together, take off the old cotter pin on the tie rod end, then unscrew the nut. Another good thing about leaving everything together but loose, is that you got some wiggle room to maneuver the strut as you hit the bottom of the tie rod end upward to knock it free so you can pull the strut out. I would use a rubber/wooden-mallet/hammer. Keep moving and hitting upward, it will eventually come out. No worries. Then pull the entire strut assembly out.
****DON'T FORGET TO ZIP TIE THE KNUCKLE SO THE AXLE DON'T POP OUT!****
2.
-It's time to swap out the tie rod ends. I had to get crafty because of how weathered all my components under my car were, so this is what I did to get it apart.. Take the proper sized wrenches and put one securely on the tie rod end lock nut as shown in picture. And then take another wrench that fits on the tie rod end itself or vise grips and turn it and break it free, then remove the old one.
(I used the handle to my jack to go over the handle of the wrench and put it through the empty strut tower, and had someone hold it while I broke free the tie rod end due to the weathering on the parts.
-Now, screw on the new tie rod end.
NOTE: Your Toe will be F'd and thrown out of whack after putting on these new tie rod ends, not to point the car cannot be driven, but it definitely needs an alignment ASAP after installation is complete.
3.
-Replace the old strut with the new A-Spec strut. I recommend putting it up through the strut tower and just threading on the 3 top nuts (see the yellow circles in the previous picture above) just to get it in there and have it remotely in place and holding itself up.
-Now, don't panic. It's going to look like there's no way in hell they're going to line up and be able to be mounted together, but don't sweat.. What I did, was use that same jack handle to push down the control arm by wedging it to another spot on the frame (shown in pictures below) so that you can line up the mounts and bolt up the knuckle to the strut.
-TIPS: As always, keep everything connected but still loose until everything is connected, then start tightening things down. I would do the 2 large bolts on the knuckle first, then the 3 nuts on top of the strut tower, then I would connect the new tie rod ends for last, because they are easy to get in place since there is so much mobility in the tie rod and the joint rotates and swivels.
-Everything else is pretty strait forward from here on out for the fronts. Just tighten up bolts, secure the new tie rod end with one of the new nuts you purchased and then a cotter pin. Should look like this when you're done..
-Now, do the same thing for the other side, only other tip I can give you for the passenger side is to remove the bolt that's keeping the AC line in place (as shown in picture) This makes it a lot easier to get to the nuts on the top of the strut tower on the passenger side.
REAR
Before I start on the rears, I gotta give a little background. The bolts in the rear typically, and ESPECIALLY in my case, can be quite problematic. What typically happens, especially here in the northern states is that they seize up on the metal sleeve inside the bushing and they can be an absolute PAIN to take out. For more information on this, and solutions, check the thread below..
Because I ran in to these problems, I had to put my installation on pause and wait until a friend of mine had free time so I could get it up on a lift at his work so we could work on this a bit more with more tools around and more range of motion. So because of this, I don't have my own pictures, so I will be using some pictures off of the DIY: Coilovers. Props to CHASEEE
1.
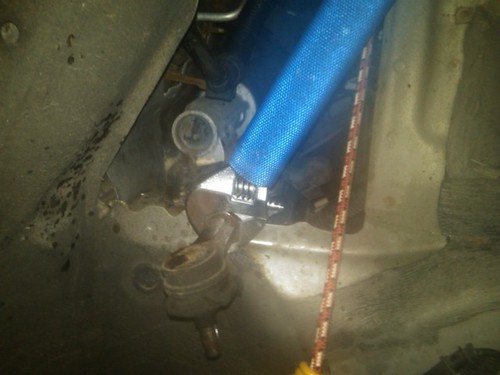
-Jack up the car and remove the wheel, while supporting the car with jack stands of course, and spray down the 2 main bolts (one on the passenger side, one on the drivers side) with penetrating oil. The head of the bolt is not on the outside of the car, it is on the inside, the fixed nut is shown in the picture below. Remove the bolt.
-Now, open the hatch and release the back seats so that they fall forward, pull back the carpet and expose the push pin clip thingy's'''' and remove them. Pull out the plastic molding to expose the top of the rear struts, remove the two nuts and pull the old strut out.
Now compare.
2.
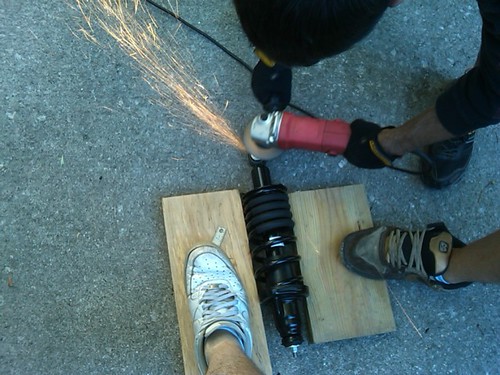
-As you can see, there is a significant difference. It's time to bust out the grinder and get dirty. Take approximately 1.5mm of BOTH sides EVENLY AS POSSIBLE, for a total of 3mm OVERALL to make the rear struts fit. Be careful, this will take some time. Do slow and smooth FULL passes to try and make a nice even grind all the way down. Measure before you start grinding, and keep measuring frequently, you can always take some off, but you can't put it back on. Also, friction causes heat obviously, so give this time and be patient with this. You don't want to grind the piss out of it and melt out the rubber bushing, TAKE YOUR TIME!
3.
Put the new A-Spec strut back in. It's as strait forward as the same way you took the old one out. Bolt everything up and make sure everything is tight. FIN.
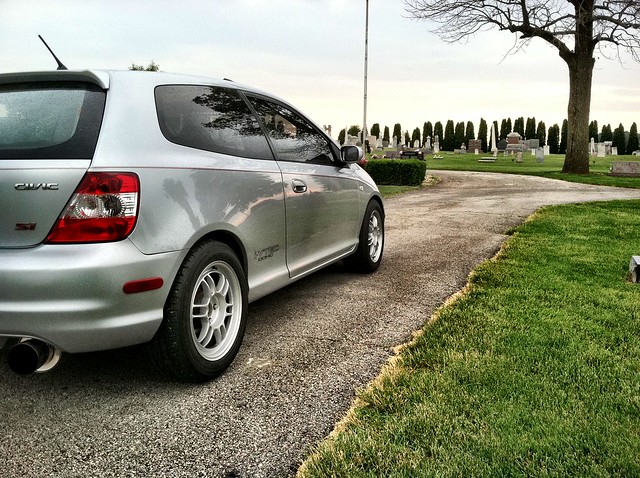
This is my car as it sits to-date 6/18/2011
16x8 +38 RPF1's 225/50


 Reply With Quote


Bookmarks