

 Reply With Quote
Waupun, WI which is about 45 minutes from you.Originally Posted by 03K20A3Si


Waupon?
Last edited by AUTiger; 03-03-2009 at 09:12 PM.

Waupun, WI which is about 45 minutes from you.
Just ordered some other parts for the car. Can't wait for spring to come so i can get them installed!

Same here! Fuck this snow lol
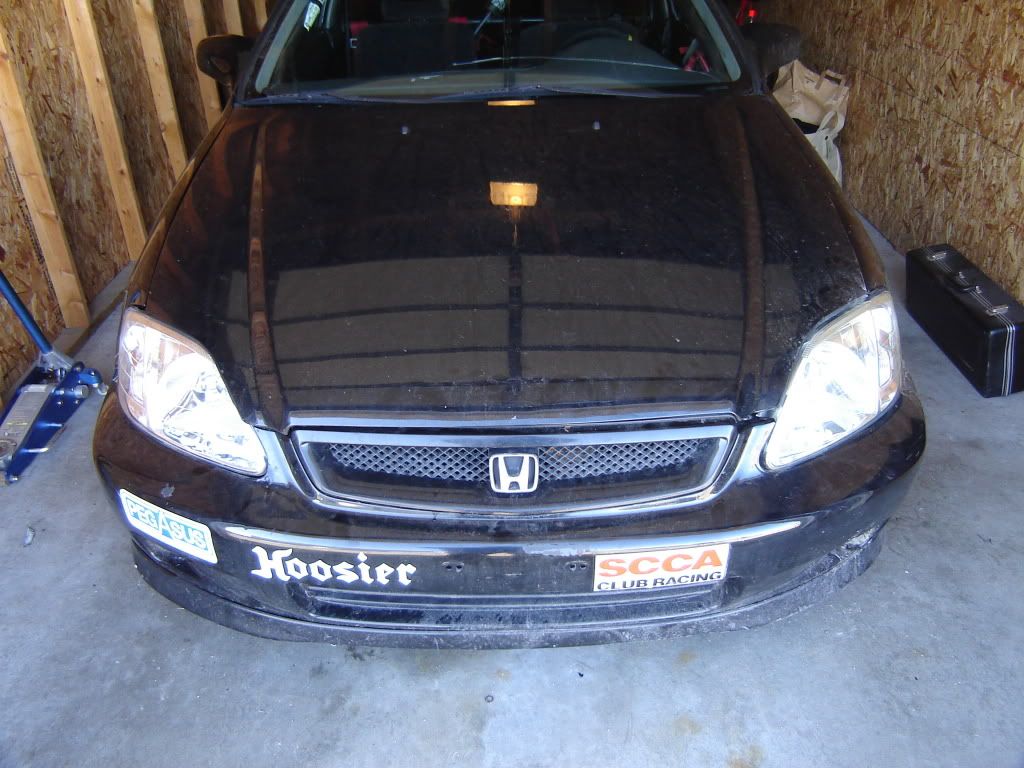
Now designated as "The TK Project"
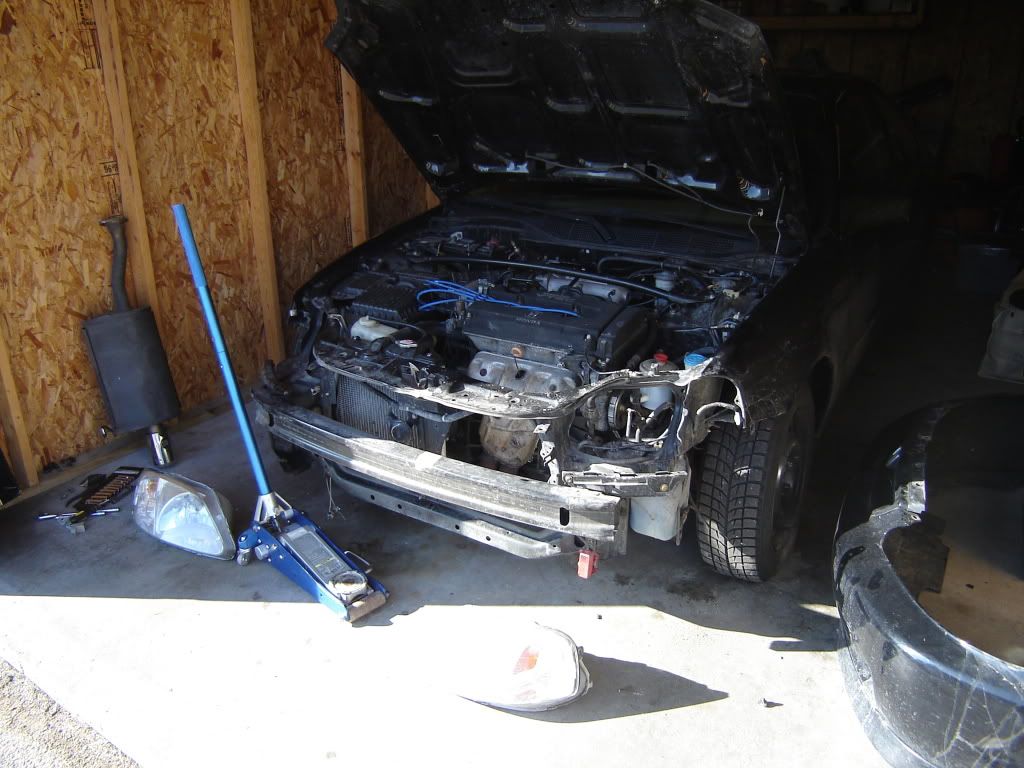
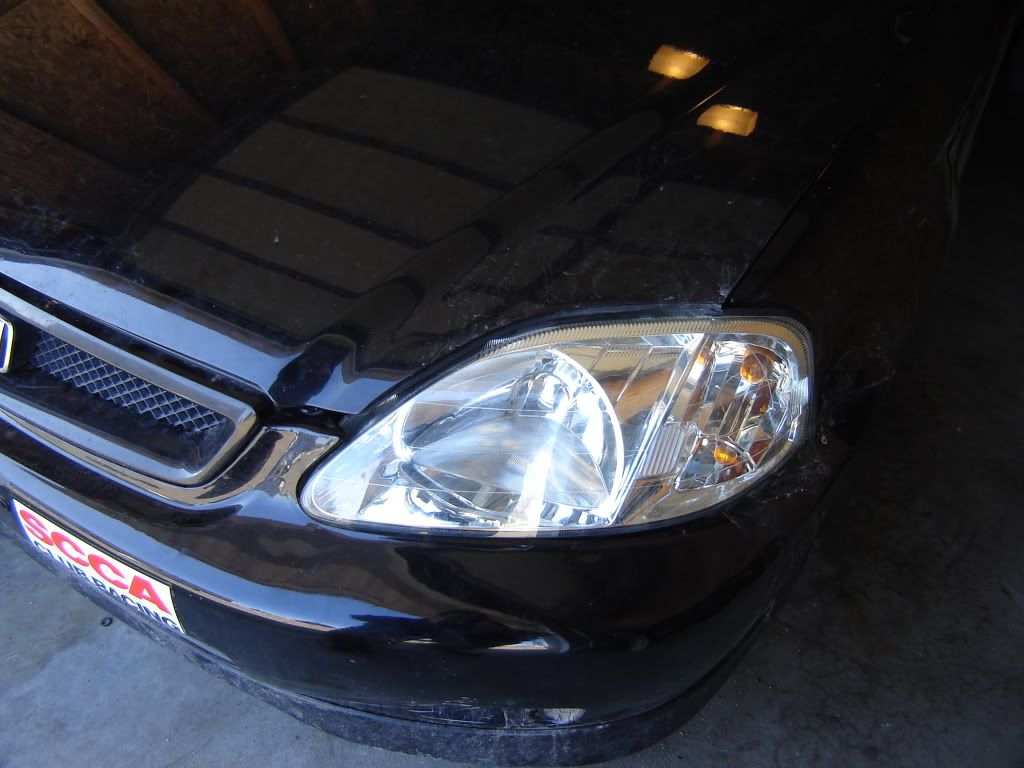
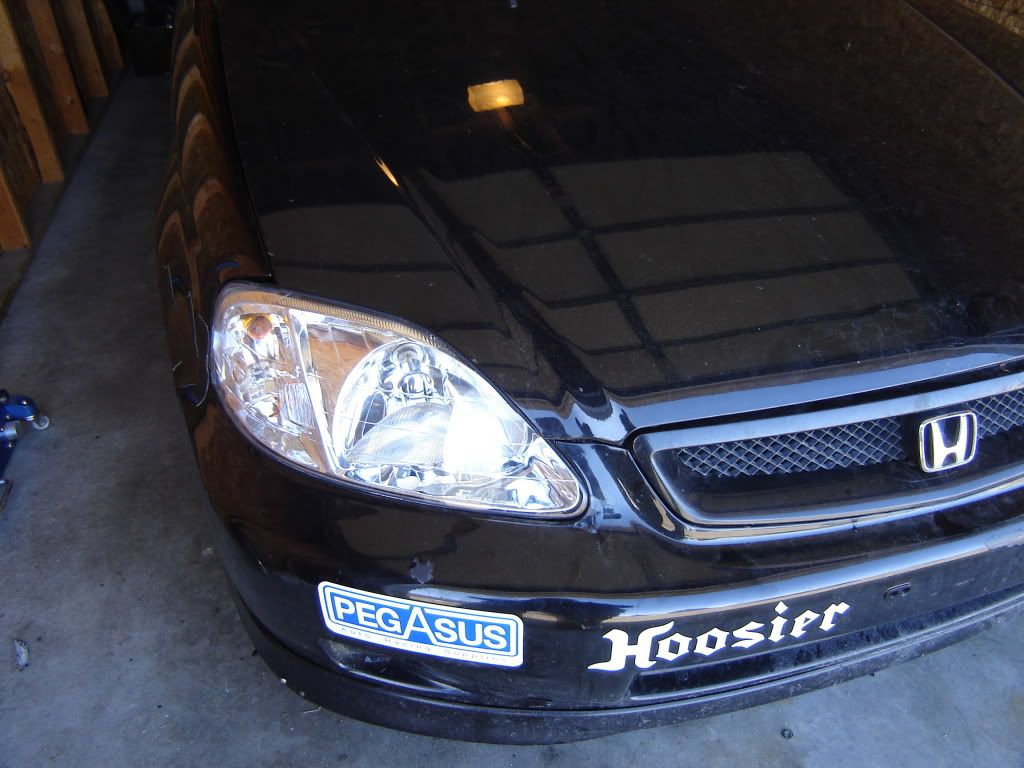
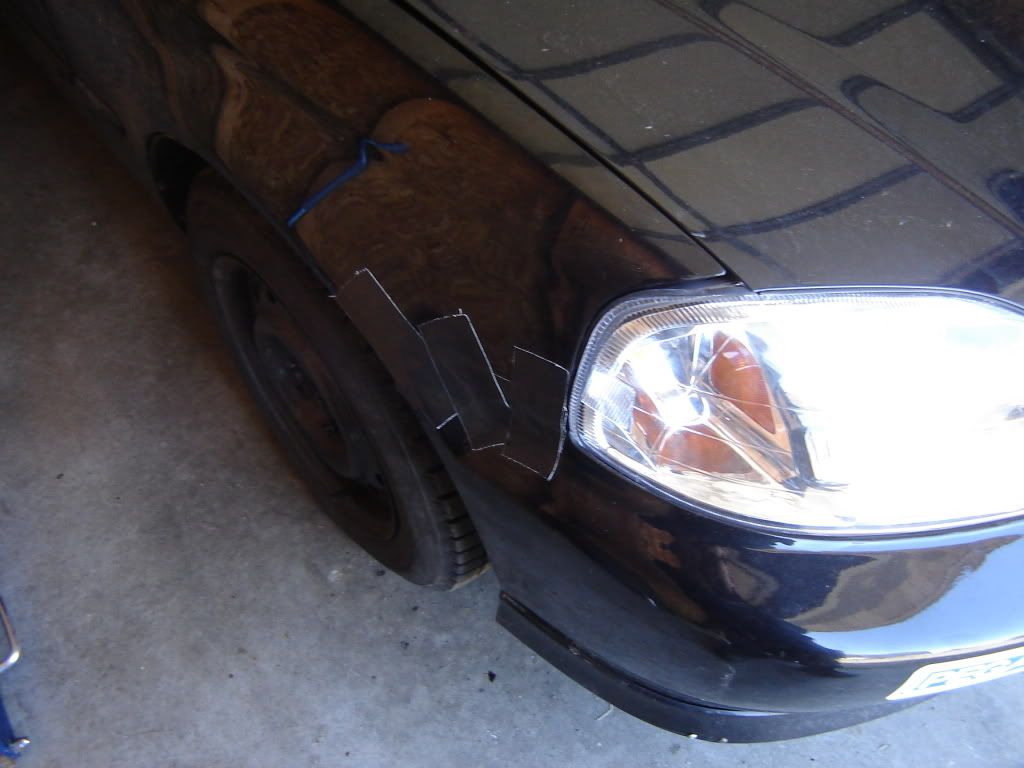
Got bored last week before work and decided that i was finally going to replace the broken headlights that had been duct taped in place. I had picked up a pair of headlights some time ago off a kid for a pretty good price. They weren't OEM, however they did have all the tabs still.
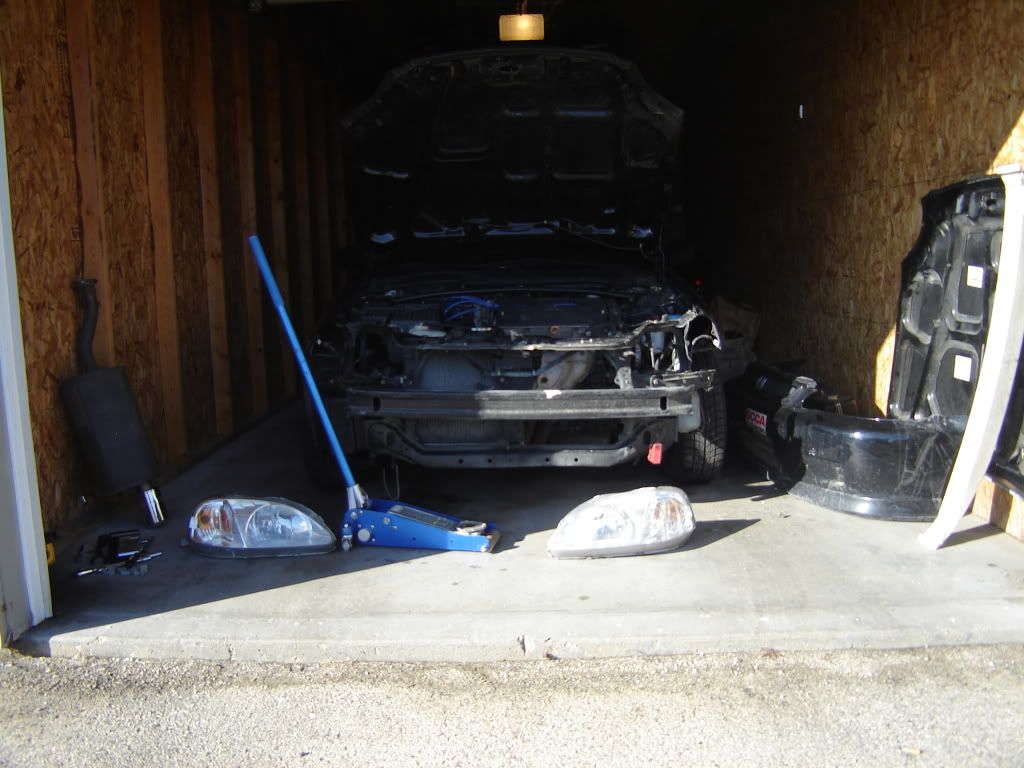
You can see how bad the body work is in these pics. None of the panels up front line up right, which is a bit of a concern to me.
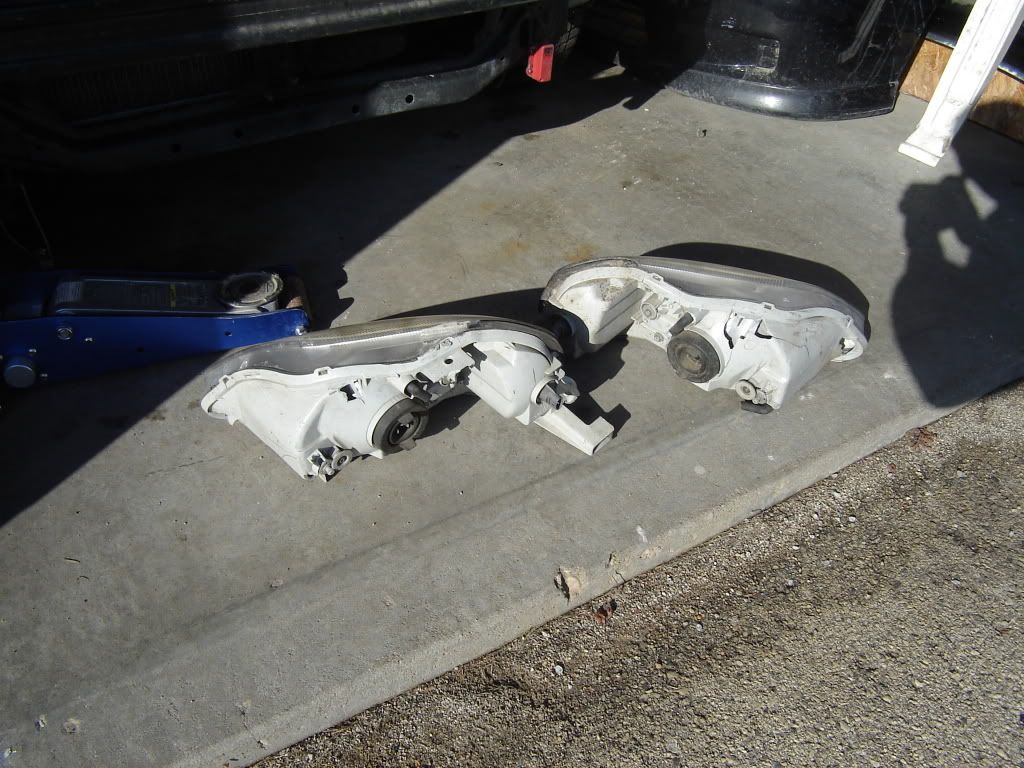
Out with the old. (You can see how the housing had been completely broke on both headlights)
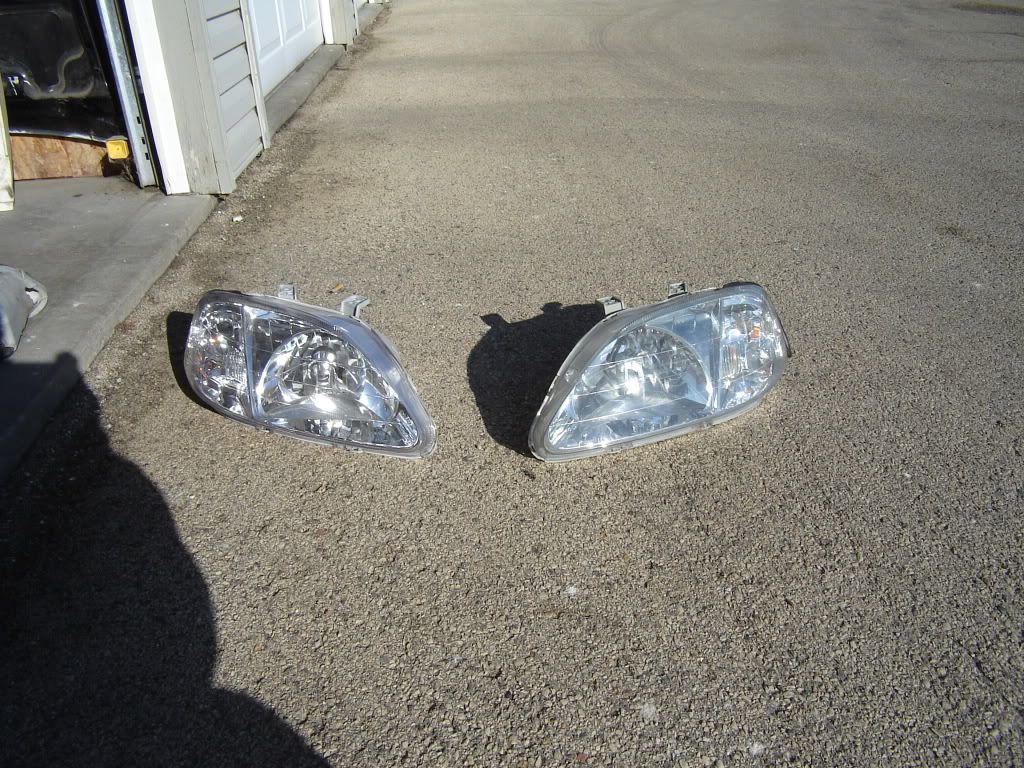
In with the new, well newer.... (Don't match perfectly but who cares.)
You really can see how bad the panel fitment is in these pics. Look at the head light gaps.
A bit of racer's tape!
This week i have been acquiring parts and tools to help this build along. From Harbor Freight, a nice 3 ton floor jack able to raise "TK" up 24", and some 6 ton jack stands. As well as two 15" OEM Si wheels to go with the remaining pair i already had, i will be using these with the Hoosiers i still have remaining from last season. And finally, a manual steering rack and front subframe to help free up some ponies down the road.
Other parts awaiting install include: Fastline Short Shifter, SPC Camber/Caster Adjustable Front Upper Control Arms, 17x7.5 Kosei K1 Wheels (maybe later this season), new valve cover gasket and cam seal.
Still need to purchase: Rear camber arms, new windshield, brake rotors and pads. If i get some good overtime in come March. I hope to have enough for a decent Koni/GC combo.
Last edited by 20CiviC02Si; 02-21-2012 at 11:36 PM.
Finally started on gutting TK! Got bit a few times when some of the plastic panels snapped, however majority of them are out. As well as the carpet. Tomorrow the headliner will be getting pulled, and hopefully able to saw out what's left of the rear seat.
Pics of today's progress:
This panel was the biggest PITA ever. Plus it bit me back as i ripped it from it's home. Bastard!
A little something to look forward to. Removed the rest of the padding on both halves so that i can cut out the metal frames later.
All the trim that holds the headliner in plus some seat belt hardware.
Finally majority of the carpet is out. Bits and pieces still need to be removed.
If you're planning on having a full blown race car that's gutted and caged. Take my advice! Don't start with a Showroom Stock prepped car!
This build is finally getting somehwere! Here's the updates:
Started off by installing my Fastline Short Shifter, went without an issue. Although a bit tough getting the shift linkage over the bushings.
Had a bit of a scare when i went to remove the valve cover in order to replace the leaky cam seal, this is what i found.
Later determined that it was caused by condensation from all the crazy weather changes we've been seeing. So i installed the new cam seal and buttoned the valve cover up with a new gasket.
Then i got back to work on gutting the interior. Made some progress by getting 7/8ths of the headliner out of the car. Now i'm just hung up on what's stuck under the visor mounts that weren't removed before cage install.
So i left it there for the day. Tomorrow going to get to cutting stuff out. Those visor clips and these.

Cool project man! I have a 2000 EM1. Right now it has an Autopower 4-pt in it. It has the full interior in it along with the rear side panels. Getting the side panels in there with the roll bar was a real bitch so I feel your pain!
Well i was a bum and really didn't start working on the car until about 7pm. Before then i made a run to the hardware store to pick up two shop lights and tubes for them. Hung one up and then started working on cutting out the rear seat frames. Removed the small half completely, and cut through the tube frame on the second. However the hack saw i was using doesn't like to cut through the sheet metal backing. So i have to pick up a metal sheer to finish off the job.
A reciprocating saw would have been awesome to have. 30 minute job by hand would have taken 2 minutes with one.
I really need to start saving up for a larger workspace and tools. But a 10x20 garage is better than nothing at all. So i'll work with what i have.
those seats are kiking ur ass
Well it has been a very busy and eventful day. Shot down to Indiana and met up with my buddies Jason Morse and Tim Hulce. Picked up the coilover setup for the build from Tim, $650 well spent. Only thing that will need to be changed on the setup is spring rates. Which are currently sitting at 290lbs front and 350lbs rear, it'll have to do for now.
Afterwards met up with Adam Jabaay and hung out with him and Tall Kyle. Helped work on the "pumpkin" Lemons build. More or less just sat around and helped whenever Adam needed an extra set of hands.
Shot back up to Wisconsin, stopped off in Racine. Picked up a new vacuum hose for my shop vac, as well as the much needed metal sheers. 2 hours on the highway later and finally finished off the removal of the rear seat.
The remains of the second half of the seat.


nice build
Ran into an issue of removing the dirver side and passenger side restraint mechanisms. They are encased by the steel interior cross member. I attempted to remove driver side panel of it, and realized that the lower bolt just below the seat belt mechanism is pinned by the roll cage.
Now if i had the tools and space, i'd be able to get a cut off wheel and cut the head of the bolt off. However i don't.... So trying to button it all back up and wait until i have the tools to do it.
Removed the rear plastic deck lid and speakers. Looking into removing the whole rear deck assembly all together down the road. I'll have to relocate the wiring once this is accomplished.
Later going out to remove the rear seat belt mechanisms.
Looking forward to installing all of this! Need to get my r comps mounted in order to get the car aligned after the install.

Well got the car back up in the air after centering it in the garage. Started working on removing the suspension from the car. Fronts came off with ease, however i can't say the same for the rear. Upon attempting to loosen the bolt that attaches the camber arm to the hub, the head of the bolt sheered off.
I really need to invest in some better tools. A handheld impact would have been awesome, probably wouldn't have sheered the bolt.
So now it's looking like i'll have to remove the entire rear trailing arm assembly in order to drill out the now headless bolt.
Well finished drilling out the one bolt that snapped off. Now the bolt that connects the rear control arm to the trailing arm is being the bitch. So i was forced to drop the whole assembly off the car in order to have someone a little more knowledgeable at removing pain in the ass bolts off. Don't have the means to do it myself now that it's rounded off. Heat, impact, breaker bar, and brute force did not work.
Rear trailing arm is now off the car thanks to my new Milwaukee electric impact!
All my attempts failed..... The pipe and breaker bar just managed to round off the bolt's head.

As you can see in the pic that the bolt that secures the rear control arm is rounded off now. Have a feeling that it seized up on the bushing.
There are currently 1 users browsing this thread. (0 members and 1 guests)
 Posting Permissions


Bookmarks