Close

Page 2 of 19 FirstFirst 123412 ... LastLast
Results 16 to 30 of 282
  1. #16
    Registered User gtimportfanatic's Avatar
    Join Date
    Jan 2009
    Location
    Hartford, CT
    Posts
    1,024
    this is def awesome.. looking forward to this some more for ideas, as i have removed rear seats, converted driver seat to a bucket with buddyclub rails, buddyclub coilovers, lighter larger exhaust and raceheader.. i think the core things i need to work on while still keeping the car daily-ish, would be getting rid of the ac system, already got rid of the subs just radio and door speakers.. would be interesting to see where i'm at now that this thread has me thinking about it. i'm more curious on the body modifications you plan to perform on the build however because i have always wanted some of the more rear looks out there similar to the BTC's and the works of company's like 3Q

  2. #17
    Registered User Hasbro's Avatar
    Join Date
    Nov 2006
    Location
    Hilton Head Island, S.C.
    Posts
    1,431
    eDammit, I need to go to bed! How am I supposed to go to sleep after talking to Ba82 about engine mods and now the rest of you are talking about pulling weight and body design. It's 2:00 am!

    I love hearing about other weight reducing projects. Who's ready to spring on a 4 lb. battery? Just a matter of time for me...
    Last edited by Hasbro; 12-27-2012 at 02:04 AM.

  3. #18
    0EM xEcuTi0n Ba82Ep3's Avatar
    Join Date
    Feb 2006
    Location
    Mobile, AL
    Posts
    2,251
    Man i LOVE the look of the BTCC EP's. Im not crazy about the wing so much... although i know for racing it would be more effective than say an HFP wing. The BTCC cars were race purpose tho. We had a thread on here at one time that had a lot of the underchassis pix showing just how far the teams veered away from the original OE design. Long live three wheel cornering!

  4. #19
    Registered User gtimportfanatic's Avatar
    Join Date
    Jan 2009
    Location
    Hartford, CT
    Posts
    1,024
    haha.. thanks for having an awesome build thread.. i will def be taking notes on the weight reducing techniques as i have ran out of things to do lol.. only the majors left that i can think of

  5. #20
    明らかにド素人 JDM SHIT! playap07's Avatar
    Join Date
    Apr 2008
    Location
    Beale AFB....
    Posts
    1,120
    oooww this is going to be very interesting! I will be watching muhahaha

  6. #21
    Registered User Hasbro's Avatar
    Join Date
    Nov 2006
    Location
    Hilton Head Island, S.C.
    Posts
    1,431
    Hey all. Still computerless, so still not around much . Finally bought some really nice Ray's Dura Nuts nib from Groovezog (thanks, nice doing biz with you) and had the Koseis mounted up today. Also had a full synthetic oil change done. Oh yeah, Kumhos are loving the extra 2" width. The stock wheels weigh 21.75 lbs. each and the stock lugs total at 1,000 grams/about 2 1/4 lbs. The Koseis are a bit under 16 lbs. each and the Ray's lugs are about 20.2 grams each iirc, maybe 22 grams, can't remember. 89.25 - 64 = approx. 25 lbs. reduction in sprung weight. Puts car at about -315 lbs. from stock. Slowly but surely.

    Feels as expected; stiffer sidewalls and less weight translates to a much quicker reaction etc. Have to re learn the handling - quite different. Time for a basic alignment! It's a bit too cold this week but will play with tire pressures to get a better response. Fill the air tank and go have fun.

    At about stock height - waiting to do the Type R lcas, solid bushings, etc., before lowering and corner weighing. Might also wait until tires I'm waiting for are introduced to the market or might just do some Toyos if I can't wait. We'll see.

  7. #22
    Registered User gtimportfanatic's Avatar
    Join Date
    Jan 2009
    Location
    Hartford, CT
    Posts
    1,024
    Are you waiting for the direzza z2's?

  8. #23
    Registered User Hasbro's Avatar
    Join Date
    Nov 2006
    Location
    Hilton Head Island, S.C.
    Posts
    1,431
    Quote Originally Posted by gtimportfanatic View Post
    Are you waiting for the direzza z2's?
    Whichever one that has the correct size and also what the GrassRootsMotorsports tire test has to say. There are several new ones coming out. The Bridgestone RE-11 or whatever it will be called is supposed to be very good. Two of mine are worn out so may just slap on some Toyo R1R 225/45/16s to hold me over. For the rear and maybe 245/45/16s for the front.

  9. #24
    Registered User sir_2002's Avatar
    Join Date
    Jan 2010
    Location
    canada
    Posts
    125
    Technical question for you hasbro

    How do you calculator Hertz for the suspension ?

  10. #25
    Registered User Hasbro's Avatar
    Join Date
    Nov 2006
    Location
    Hilton Head Island, S.C.
    Posts
    1,431
    Quote Originally Posted by sir_2002 View Post
    Technical question for you hasbro

    How do you calculator Hertz for the suspension ?
    I'll post the calculater in a bit.

    Here it is;
    http://forums.clubrsx.com/showthread.php?t=666471


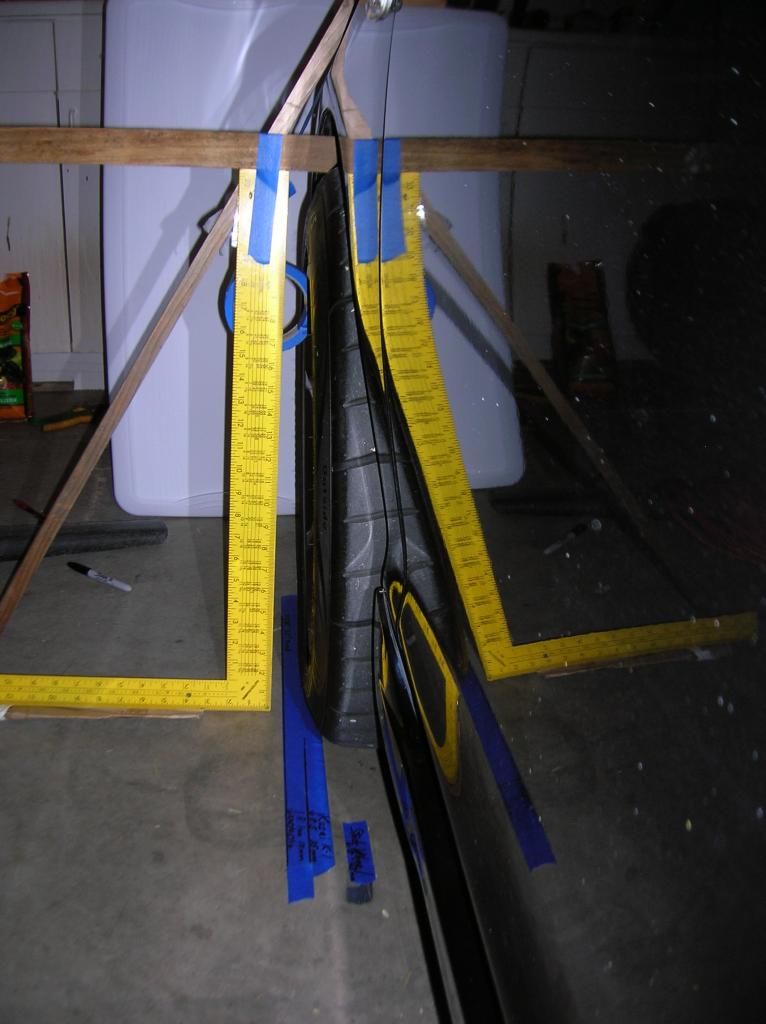
    Ok, this post is otherwise worthless to view until I get the new computer and can post a couple of pics - or if you are very good at visualizing! Good luck with that. I just want to write down some stuff before I forget them.

    Pics show 3 blue tapes under front wheel of existing 225/50s with the 8.5" Koseis.
    Inside edge of inside tape is outermost edge of stock wheels (6.5") with the stock tires, approximately.
    Outside edge of same tape is stock wheels with 225/50s.
    Outside edge of 2nd tape (middle) is current width of 225/50s with Koseis (8.5).
    Outside of outside tape is where tire will be with R lca (+10mm) and 245/45/16s (9.5"). +13mm.

    Eat your heart out, MIT;


    R lca/245/45s approx. 60 mm wider than stock wheel/ 225/50s.
    Increased camber; add approx 15 mm wider at bottom, 15 mm narrower at top - as shown by yellow square.
    Pic shows approx. where lowered 245/45s might be.
    Angled stick shows where flared fender (all metal) will approx. extend. 1' down, 1.5' out. Blue tape parralell to stick is approx. tire location.

    Mention track increases, approx.
    Work on hertz/spring weights re. new geometries-
    Fender has enough room inside for full compression-

    1/30/13
    - Decided to hold off on solid bushings up front. Free a little money up for a laptop and will strive towards getting stock Type R lcas installed. That will get me very close to final geometries and can corner weigh.
    - Next will be new tires for front, 225/45/16 or 245/45 or engine work, depending on availability times of new tire models and testing. Really lusting for the 245s up front and they would match pretty well with the rear 225/50 Kumhos, which still have nice tread, about half way worn at most.
    Last edited by Hasbro; 02-09-2013 at 02:21 AM.

  11. #26
    that ain't rootbeer! skoolnu's Avatar
    Join Date
    Apr 2008
    Location
    Clay, New York, United States
    Posts
    324
    damn, talk about shaving weight... good luck with the build

  12. #27
    Registered User Hasbro's Avatar
    Join Date
    Nov 2006
    Location
    Hilton Head Island, S.C.
    Posts
    1,431
    Quote Originally Posted by skoolnu View Post
    damn, talk about shaving weight... good luck with the build
    Thanks, same to you!

    Trying to find someone to help me put in the R lcas. It's the only car I have for now so it can't sit, must be done in one day.

    The Kumhos are feeling really good at 34 psi front/ 31 rear. So low but that's from the tread width equaling the wheel width, I guess. And that's cold at about 50 degrees.

    After the lca install, think I'll go with an intial drop of 3/4-1" front, 1-1 1/4" rear, -1 3/4 front camber, -1 rear, and then corner weigh it. Conservative but I want to try those specs and then go for as much caster as possible. I'd really like to get a new top plate for the Hotchkis camber kit CNCed to become just a caster plate and do all of the camber with camber bolts down below. Etc. Work on rcas front and extended washers (SHG_EasyE) for better camber later.
    Last edited by Hasbro; 01-31-2013 at 10:53 PM.

  13. #28
    Registered User Hasbro's Avatar
    Join Date
    Nov 2006
    Location
    Hilton Head Island, S.C.
    Posts
    1,431
    Notes

    -Computer. Ordered a new Asis 15" laptop yesterday, should be ready by end of week.Can start showing pics. Yay!

    -Tires. The only 245/45/16s available that I would want are the Toyo R888s They are shorter, 24.4" compared to the others at 24.7, they are lighter at 23 lbs. while the others are 25 lbs. Unfortunately, they have a UTQG of 100 and cost $225.00. They are getting more towards a track set up than a road set up so maybe the 225/45/16s will have to do. 22 lbs and an inch shorter. I'll try to get the Kumhos to hold out till spring when the new selections come out. This is still driving me nuts and I could change my mind every two days so...

    Edit, same day; Ok, less than two days. How's this sound? I only drive about 6,000 miles a year and the Kumhos gave me 2 1/2 years on the front and they are now on the rear with newer Kumhos up front. I could slap some new R888 245/45/16s up front for a year - or 3/4 of their lives - .and move them to the rear for the second year and put new ones up front. Budget for two new 245s a year at about $600.00. Fresh front tires every year! The rears would be older and therefore have less traction but that's a plus. And the R888s sidewalls are .6" wider at 9.8"but the additional 10mm width of the Type R lcas should prevent any inside rubbing, right? I really like this idea.

    -Mechanic. A friend's friend looks to be the guy I'd hoped for. Going to back to work at his dad's body shop so he will be able to help me on the side. Maybe he can help with fabricating the flares. Very good.

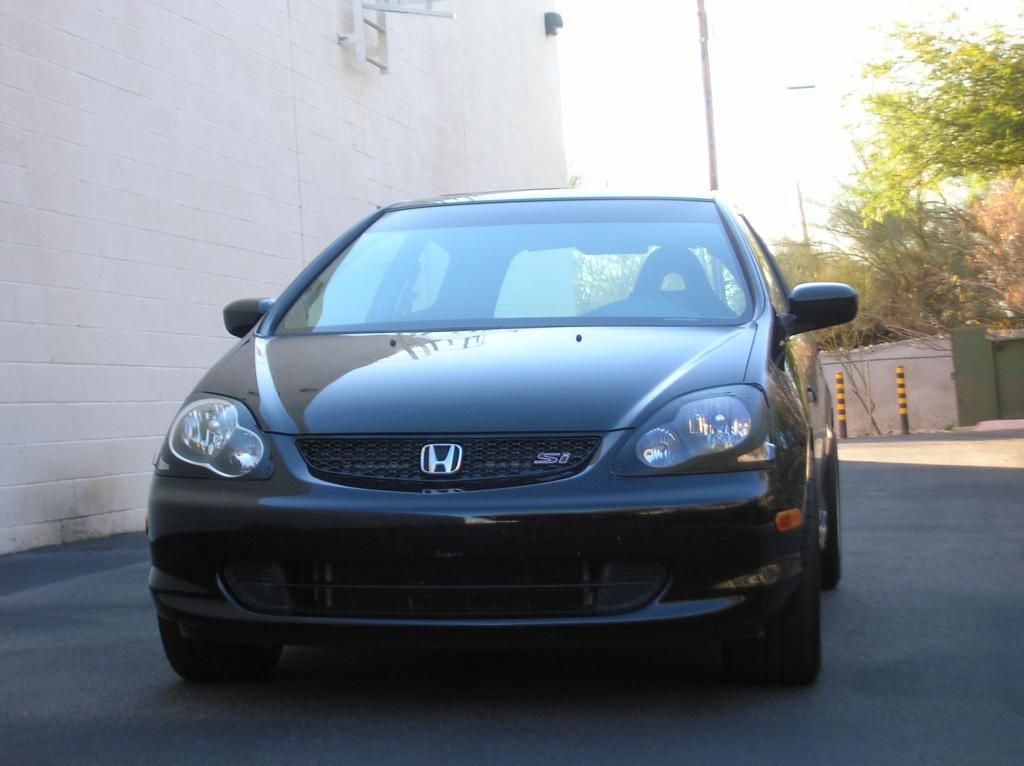
    -Exterior. You know how you can look at a portion of the EP's body and it looks beautiful but from another few feet over it seems to be a bit off? There are several of those to me. It aint an XKE. One of those spots ( to me) is from the side mirror to the headlight. It adds high visual mass. There are two strong lines; the one that starts at the top of the front fender and creases along the side just below the windows and around the back. The other starts at the front just below the H, up the hood, up the a pillar, and along the sides of the roof. The area between them (mirror to headlight) bugs the crap out of me. It's bulky and segways poorly. A couple of things I will do there is use smaller rounder mirrors and black out the headlights on the outsides as opposed to painting the insides. I have taped them and it seems that it will work. For me. The stock headlights appear too tall, bulky, and create too much overhanging weight, visually speaking. Painted, they will appear more diminutive and also lower the visual mass. By adding the low mass of the flares this area should have more balance with a nice low, squat, wide look. If the reader has a good design eye or smokes pot, said reader should get what I'm saying. If you smoke but don't get this, you're smoking too much. Eye of the beholder.

    Edit; I should mention that the final product won't be immediately recognizable as an EP to the untrained eye. All badges off. 6" shorter, 2 1/2" off the front, 4+" from the rear, Approx. 4" wider at the flares. Etc., etc.

    The lower a pillar in relation to the windshield and hood also drives me crazy. More on that later.

    Side skirts will come off as soon as car is lowered to first 1" drop. Rear of front fender flare might be open for better aero flow/evacuation of wheel well air. Side skirt will actually start several inches under chassis so won't really be visible towards the front. This will evacuate air to the side of car instead of underneath car, which accellerates air under car and creates the equivelant of downforce. The rear side skirt will start after the door and be a part of the rear flare and will be the same width as the flare at it's widest point. Rear of flare may be open.
    Last edited by Hasbro; 02-03-2013 at 11:49 PM.

  14. #29
    Registered User Hasbro's Avatar
    Join Date
    Nov 2006
    Location
    Hilton Head Island, S.C.
    Posts
    1,431
    On, my new computer, finally!

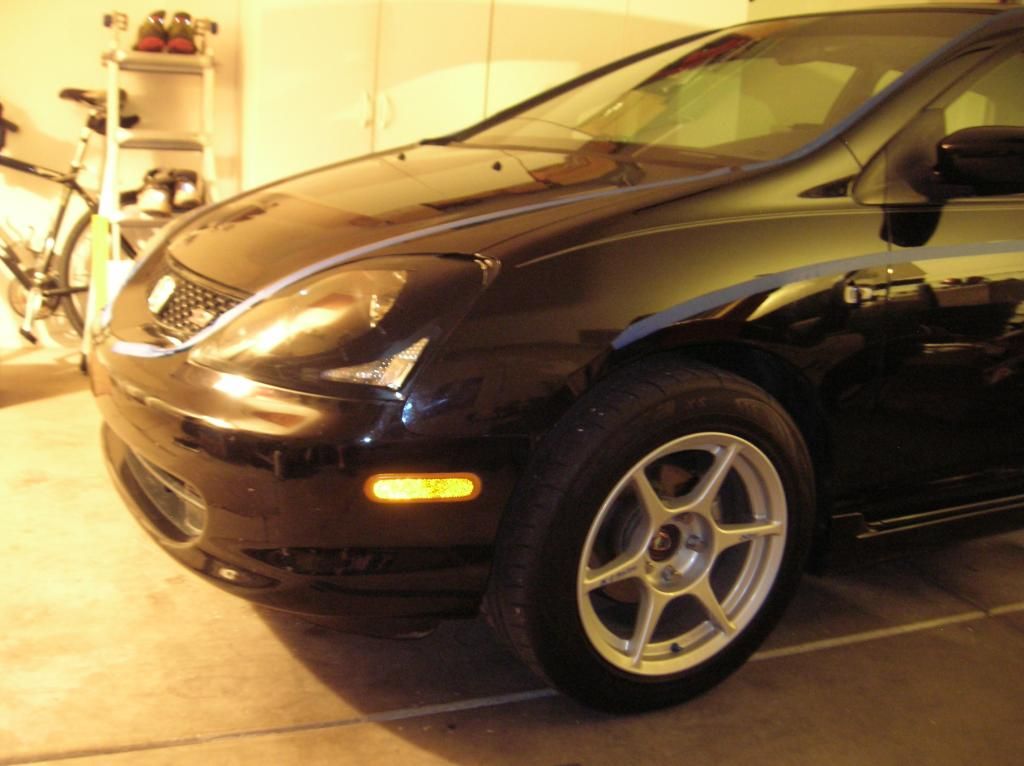
    Here's a pic of the headlights taped with electrical tape to suggest two different paint schemes. I'll be going with one on the right side of pic. It's not as clean as the other but works better for me.


    Playing with painter's tape to get a feel for some ideas bouncing around in my head.


    Wheel/pinstripe color; thinking of doing the wheels and possibly/maybe/perhaps some pinstriping in a dark metallic charcoal grey. That would also play down the wheels, appearance-wise, and move the eye to some basic body lines instead. Pinstriping would be barely visually discernable to the eye on the black body.
    Last edited by Hasbro; 02-09-2013 at 02:31 AM.

  15. #30
    0EM xEcuTi0n Ba82Ep3's Avatar
    Join Date
    Feb 2006
    Location
    Mobile, AL
    Posts
    2,251
    Does it change the way the lights look... say on the wall in the first pic?

Page 2 of 19 FirstFirst 123412 ... LastLast

Thread Information

Users Browsing this Thread

There are currently 1 users browsing this thread. (0 members and 1 guests)

Bookmarks

Posting Permissions

  • You may not post new threads
  • You may not post replies
  • You may not post attachments
  • You may not edit your posts
  •