Close

Results 1 to 12 of 12
  1. #1
    Registered User
    Join Date
    Dec 2010
    Location
    Texas
    Posts
    566

    Getting things to fit nicely, what an adventure...

    This will be a brief timeline of my past two weeks.
    Finally completed the RBC manifold install on the EP. Well, for clarification, all the ancillaries associated with the RBC. My adventure begins with the decision to finally cam the A2. My first investment was to scrap the AEM V2 sri and upgrade to the Power Chamber intake.

    Intake courtesy of thakid and the gangster Samco elbow courtesy of some vendor on Ebay.

    Of course this intake brings its own set of cicumstances...

    Password JDM relocator and Odyssey battry also courtesy of Ebay.

    The relocation was a pain because the previous owner of the car was an audiophile. Judging by the literally 20 pounds of excess wiring I yanked and the hacked up nature of the wiring. All resolved and in good running order now.

  2. #2
    Registered User
    Join Date
    Dec 2010
    Location
    Texas
    Posts
    566
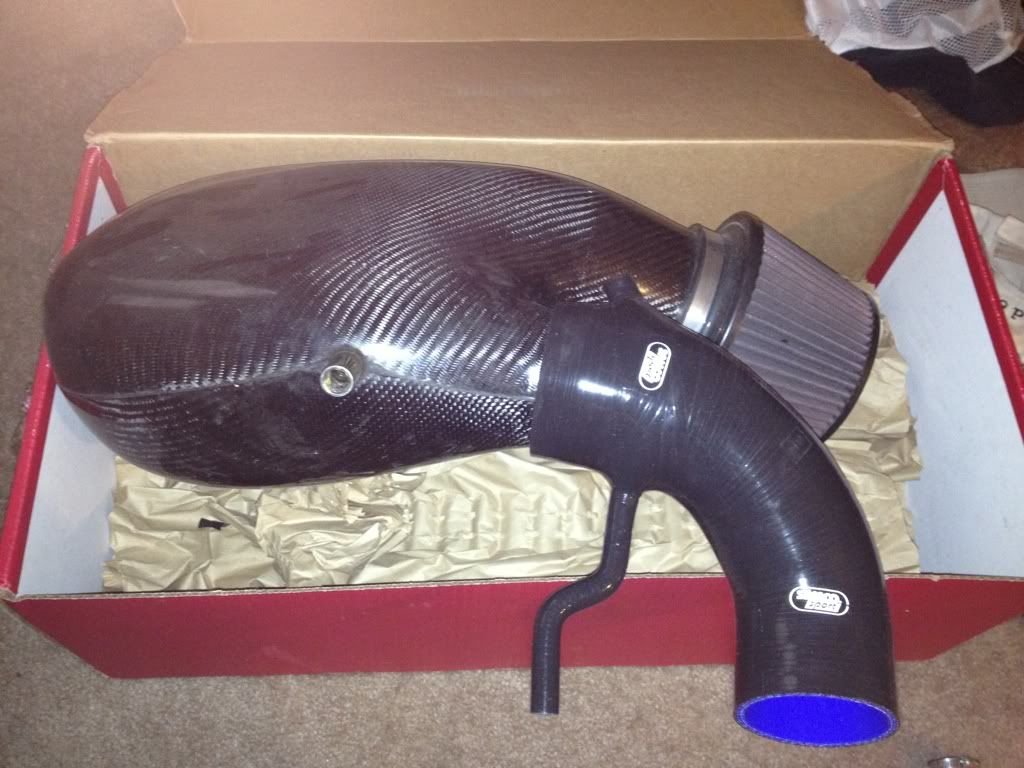
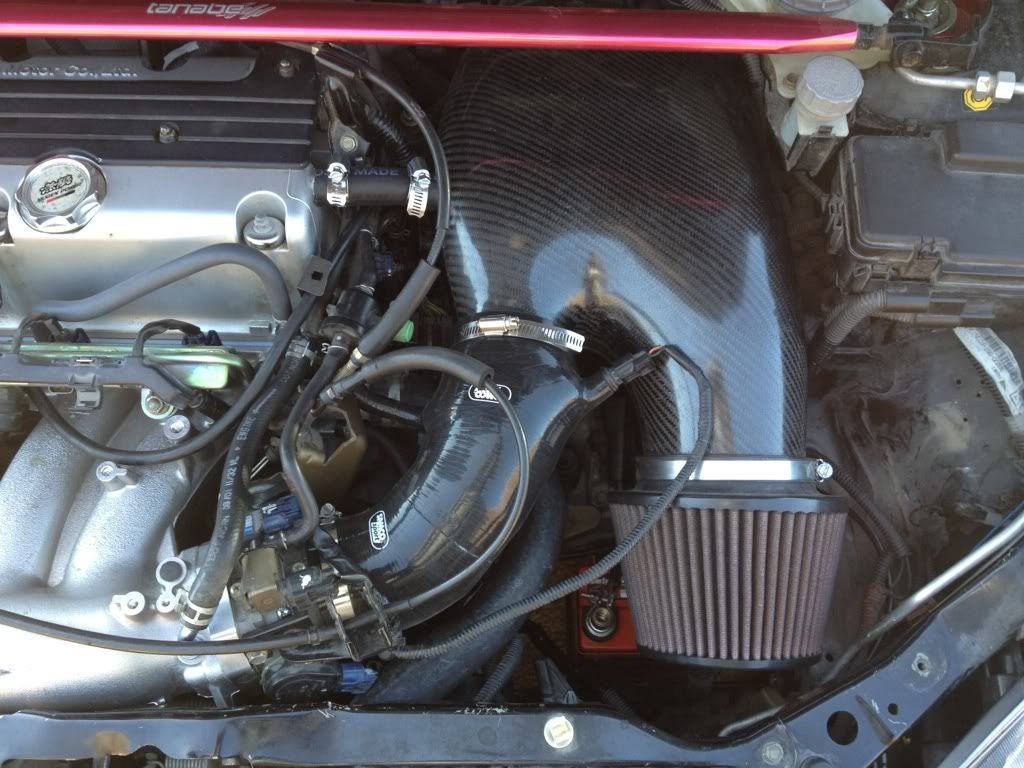
    The following weekend came the good stuff. I will note here the Power Chamber offers a noticeable improvement in mid range acceleration over the AEM intake. But now, enter the manifold...

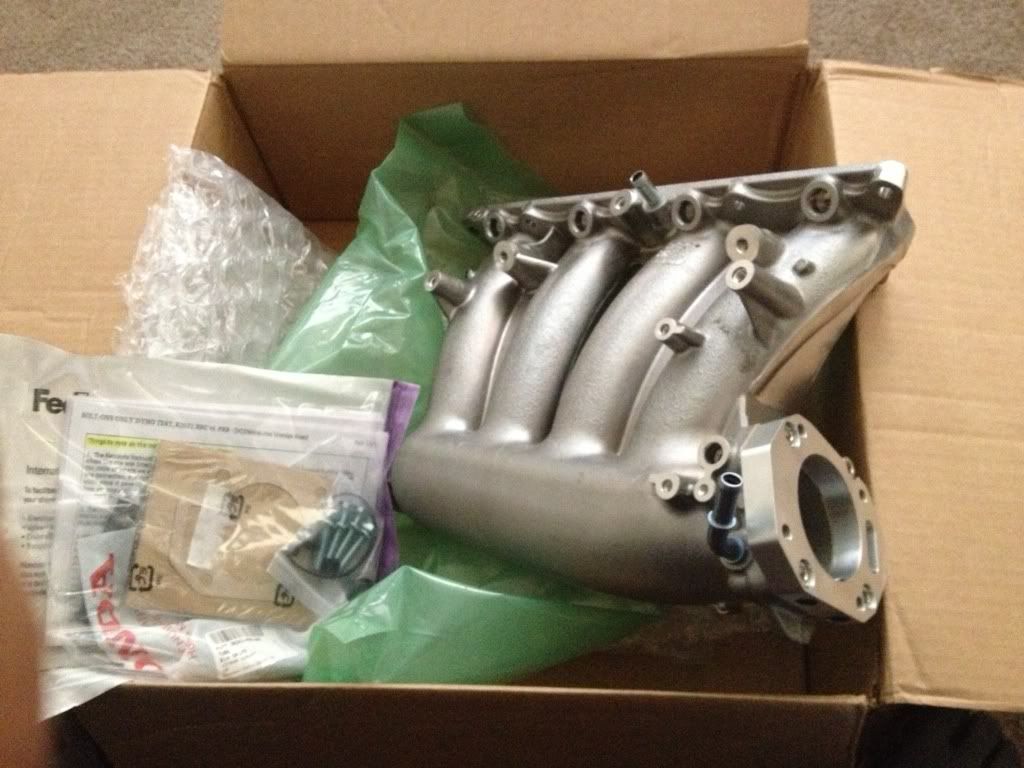
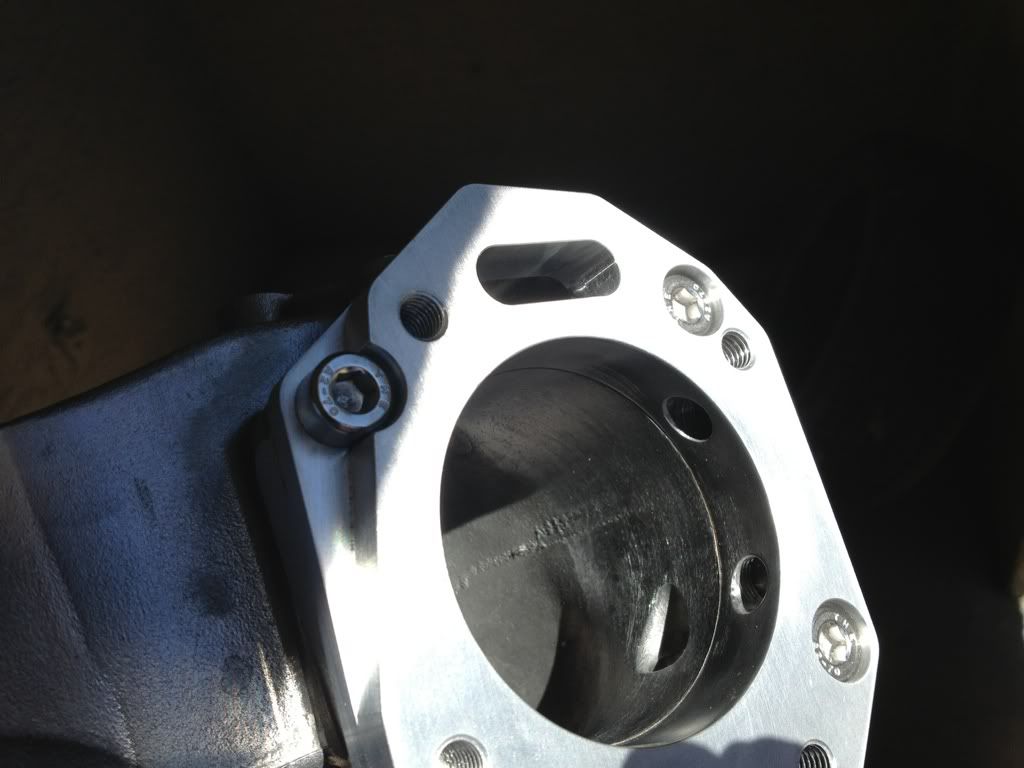
    RBC kit courtesy of Daniel, the originator.
    I did a little port matching of the throat and smoothed out the runners. What God awful sand casting these manifolds have.

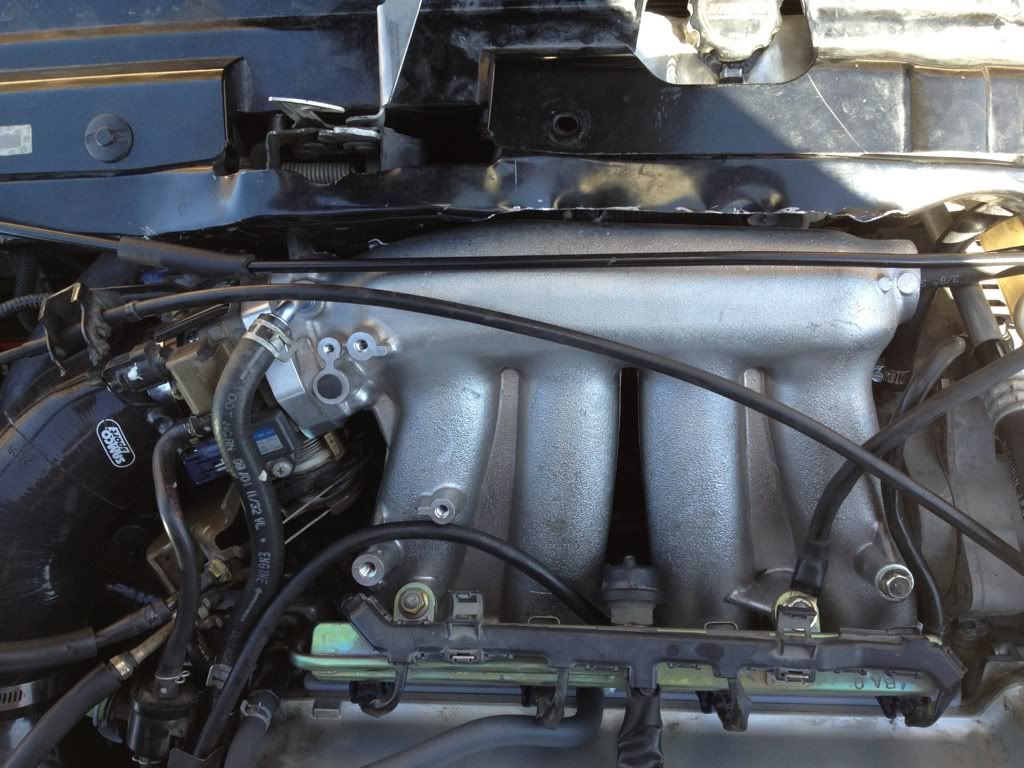
    Now the install itself was not all too complicated. I was able to get her bolted up in a couple hours using little more than some online research and the Helms PDF for torque specs.

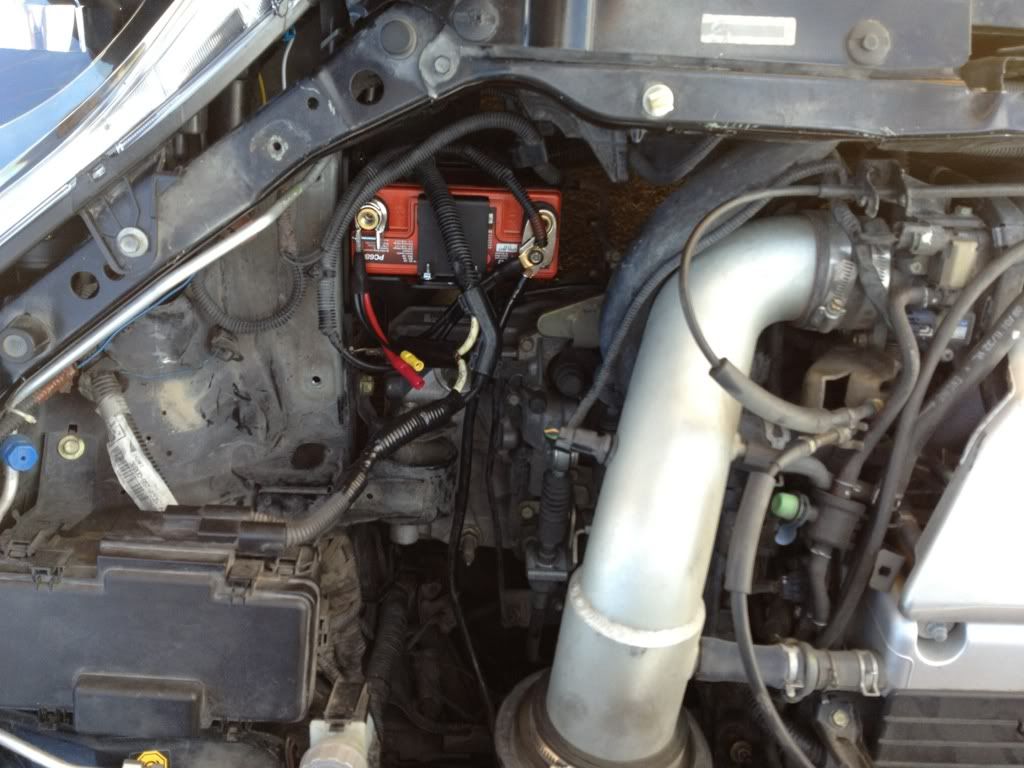
    This was where I was at.

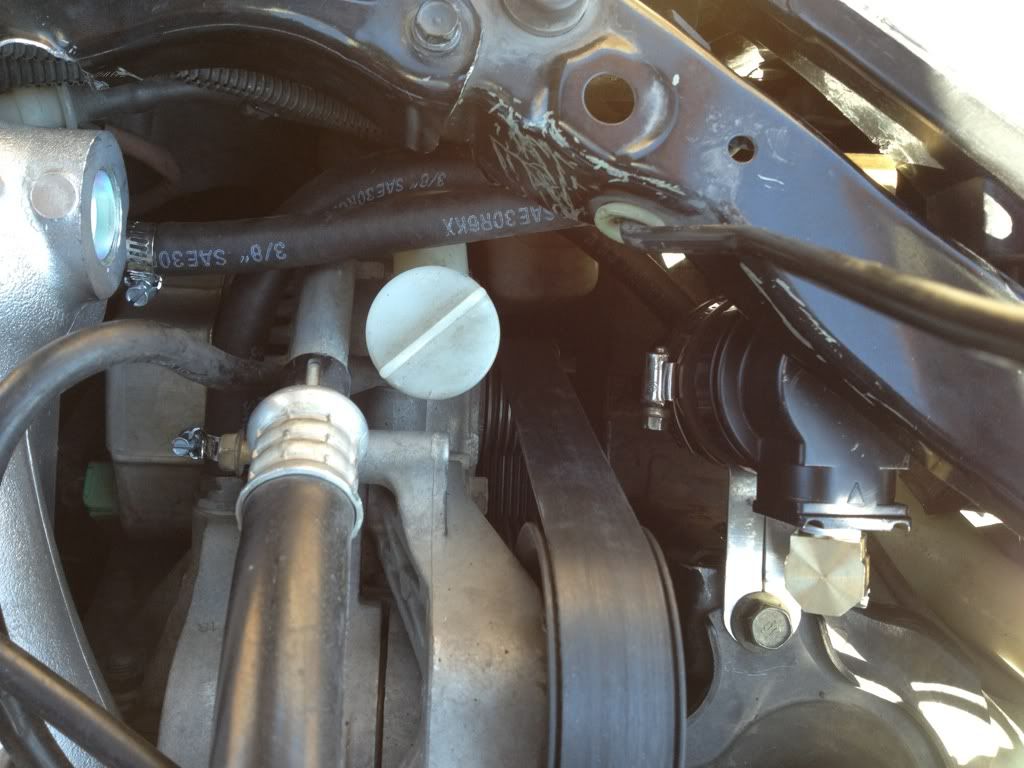
    Did some ghastly trimming with my Dremel to the upper radiator support just to get tge hood to close right.

  3. #3
    Registered User
    Join Date
    Dec 2010
    Location
    Texas
    Posts
    566
    And now,finally, I have concluded the manifold install and clean up.


    The gangster Samco elbow was cut, a section removed from the center, and put back together via a piece of aluminum pipe in the center. You can almost make out the section with the insert as well as the cut itself. Let me tell you, putting the knife to that beautifully formed silicone turned my stomach a bit, but the greater good and all that.
    At this point you will notice I have eliminated the small heater that is lined in between the valve cover and intake tube. To my understanding this helps eliminate moisture and humidity from entering the engine. I am chancing the Texas heat and engine heat will be enough to keep this from being an issue. I did however insert a small bit of, hell I dont kniw what to call it; my old 240sx had what appears to be a wire version of a baby bottle cleaner inserted in this hose from the factory. I used a 2" piece of that inside the connection. Also, I replaced all the coolant hoses on this side if the engine. 5/16th for the smaller lines not 3/8".

    Finally lined in and properly mounted the Home Depot catch can to keep my snazzy new manifold clean. A clean engine is a happy engine...

    Kind of hard to make out, but I routed the PVC/output line around the back of the canister body and the line to the intake is a straight shot. I also made a proper mounting bracket using some aluminum L and a plumbing coupler I picked up from Lowes Racing and Home Improvement Warehouse...


    A little time with a tape measure, tin snips, cordless drill and a dremel/hand file had me a spiffy mounting bracket made up.

    I also kinked the hood prop a li'l bit so now it rests on its retainer as it should and I can only imagine rubs on the manifold when the hood is closed. I reset the hood latch as well and the gap is just a tad wider than before the manifold swap.
    The engine is running a bit smoother now that everything is properly connected and plugged in. I will be ordering me up some K Pro's more than likely Monday if I can pick up an extra ECU in time.
    The afore mentioned cams will be installed next month while I am on vacation and if I am feeling squirrely, probably install an lsd as well. Should have done that when I had the tranny apart for a case swap, but I have never cursed so much as when I was going through that ordeal.

    Mods, I dont know that this rant would go in this particular section but it seems appropriate. If you feel the need to move it elsewhere by all means do so. Maybe someone can find something useful in this thread. I will definitely go into more detail when I do the cams and valve train which I will add on to this thread.
    Last edited by tinman5; 03-10-2013 at 03:09 PM.

  4. #4
    Registered User USAF EP3's Avatar
    Join Date
    Nov 2009
    Location
    Pinellas Park, FL
    Posts
    886
    The hood prop DOES rub against the manifold. If you would like to kep the manifold looking decent I suggest wrapping the prop with a buffer of some sort. I wrapped mine with a silicone based tape (self-vulcanizing) DEI now sells it they call it Fix It tape, comes in black. I've had it for a month now and it doesn't tear apart like you think it would.

    Nice little air/oil separator there. I ended up buying the JEGS brand separator as I liked that I can see through the polycarbonate case. Also the fact that it actually separates the oil and vapors because it uses a small filter. The link is here for reference:

    http://www.jegs.com/i/JEGS+Performan...52205/10002/-1

    If you ever wanted to upgrade your current Home Depot catch can to something alittle more spiffy I'd recommend that. It works as it should I've emptied out mine twice since 2 weeks ago, you wouldn't believe how much oil gets inside the manifold!! Also it's probably worse in my case because I love spinning the engine to it's redline (8500 RPM) LOL!

  5. #5
    Registered User
    Join Date
    Dec 2010
    Location
    Texas
    Posts
    566
    Thats good info on both counts. Will definitely look into both. The current seperator does in fact have a small filter that I didnt mess with so I'll see how it holds up. The metal surround has windows going lengthwise its just hard to get a decent picture, but the inside is visible. I will be attaching a length of 4mm tubing to the drain cock at the bottom as the seperator comes equipped with a valve for draining.
    And I also received an email from some cat in Houston that has a proper upper radiator support from an EP that got T boned. Probably pick that up next weekend and clearance it out properly.
    Any other suggestions or input? I'm satisfied with the end result but know some things could be done better.
    Preparing for round 2...

  6. #6
    Registered User AKEP's Avatar
    Join Date
    Apr 2008
    Location
    Sacramento, California, United States
    Posts
    2,114
    you can also just bend the prop rod a little bit so it founds around the manifold. you'd never know mine was.

  7. #7
    Registered User
    Join Date
    Dec 2010
    Location
    Texas
    Posts
    566
    I gave it a slight kink where it was really pressing against the left side of the manifold. The prop would still clip into the retainer but it was under noticeable tension. Now it rests easily in place. I have a feeling that at some point I am going to get the urge to smooth out possibly shave the top half of the mani and get my polish on.
    We'll see what the summer brings. As soon as I can pick up an extra throttle body I will be getting that Max Bored so that may well be a good time to kill 2 birds with one stone.

  8. #8
    Registered User
    Join Date
    Jun 2009
    Location
    az
    Posts
    528
    Nice work! Looking good!

  9. #9
    Registered User
    Join Date
    Dec 2010
    Location
    Texas
    Posts
    566
    Thanks. Appreciate the intake as well. As I mentioned earlier in the thread, even on the stock PRB the mid range felt noticeably improved over the AEM sri I was running. My objective is to fatten up the power band under the curve and only raise the red line by maybe 500 rpms.
    I picked up a Z3 head (Or whatever an 08 Si comes with) that will be getting properly and completely set up with some stage 2 cams flat faced/tuliped valves and new seals/springs etc.. But at that point the bottom end would best be served with a freshening at the very least.
    We'll see how long $150 a month will carry my little build.
    Man I cant sleep. Gotta be up in 30 minutes...

  10. #10
    Registered User USAF EP3's Avatar
    Join Date
    Nov 2009
    Location
    Pinellas Park, FL
    Posts
    886
    Quote Originally Posted by tinman5 View Post
    Thanks. Appreciate the intake as well. As I mentioned earlier in the thread, even on the stock PRB the mid range felt noticeably improved over the AEM sri I was running. My objective is to fatten up the power band under the curve and only raise the red line by maybe 500 rpms.
    I picked up a Z3 head (Or whatever an 08 Si comes with) that will be getting properly and completely set up with some stage 2 cams flat faced/tuliped valves and new seals/springs etc.. But at that point the bottom end would best be served with a freshening at the very least.
    We'll see how long $150 a month will carry my little build.
    Man I cant sleep. Gotta be up in 30 minutes...
    Do you still have the stock A3 or did you swap it out?

    You'll get a more noticable gain and throttle response by port matching the runners to the cylinder head instead of doing the Maxbore throttlebody and manifold. Reason for this is you will always have air turbulence in the itnake system but you'll want to minimize it as close as possible to the valve intake point.

  11. #11
    Registered User
    Join Date
    Dec 2010
    Location
    Texas
    Posts
    566
    As far as the A3 engine it is long since gone.
    Good info in regards to the port matching. Greg and Jacob on 240dot org said pretty much the same thing. I feel I have time on my hands and thanks to this site as well as others and some of the great and knowledgeable car enthusiasts I have met along the way my little build will be succesful. And if not rebuild it again, harder, better, stronger.
    Fortunately the cost of the manifold is manageable so if needs be I will source another and will most definitely make sure to have all runners and orifices matched.
    And I will be ordering the Fix It Tape through Advanced Auto Parts. Should be in Wednesday.
    Ultimately though as I may or may not have mentioned, I plan on picking up an Element. This head set up will be going on that and the better flowing built head will be going on the A2 block after some bottom end freshening. Maybe even a slight bump in compression. But definitely new bearings, pumps, chains and seals at the minimum. I am picking up some of the random stuff as it comes up. Picked up an OEM Honda gasket set and water pump back in November. Just chasing deals as they come up.

  12. #12
    Registered User
    Join Date
    Dec 2010
    Location
    Texas
    Posts
    566
    Finally received and installed the Kpro'ed ecu earlier this week.
    Unfortunately its based on a 5 speed ecu so no reverse lockout it immobilizer. I disconnected the green connector from the immobilizer box to eliminate that annoying bright ass green key from flashing. I am a bit anal about these things so I will probably send off my PRB ecu for a Kpro install and sell my current PNF (I think) based Kpro. Dont like having things disconnected out of convenience.
    Currently running the revised jonnhy6 .kal from the Hondata website with a little tweaking here and there to clean up a couple lean spots. Third and fourth gears pull HARD. Acceleration in sixth from 70 mph to 90 is improved as well. May try a couple more tunes, but Keto did a great job on that particular file.

Thread Information

Users Browsing this Thread

There are currently 1 users browsing this thread. (0 members and 1 guests)

Bookmarks

Posting Permissions

  • You may not post new threads
  • You may not post replies
  • You may not post attachments
  • You may not edit your posts
  •