Close

Results 1 to 7 of 7
  1. #1
    Registered User
    Join Date
    Dec 2010
    Location
    Texas
    Posts
    566

    K24A2 is in and running, what a relief...

    Well, as mentioned in a previous posting, I have successfully swapped a healthy, fantastic K20A2 for a second gen K24A2. The swap itself could be done over a weekend but we had to put things off for one thing or other. I will list off a few hurdles encountered for anyone considering this swap.
    My beloved old set up...


    Type S swap served faithfully, reliably and whose sounds made me remember what a proper Honda power plant was all about.

    Then the pallet arrived...


    Courtesy of the fine folks at LKQ in New Braunfels TX. Just over 98k miles (about where the K20 is at probably less) and an OEM Honda oil filter. Good sign.
    At this point I am $1400'ish into the swap.

    The obvious things that are needed, while minimal, to get this l'il guy running can not be stated enough:
    1 Honda CR V engine side mount PN11910-PPA-000
    1 K Pro
    A fresh clush kit.
    Last edited by tinman5; 11-01-2013 at 07:46 PM.

  2. #2
    Registered User
    Join Date
    Dec 2010
    Location
    Texas
    Posts
    566
    There was a couple if things I wanted to get done before slipping in the new engine. First I swapped over the oil cooler and subsequently the water pump and housing. I would have loved to install a new water pump at this stage, but unfortunately, after literally pulling a K24 out of my ass a few (non essential) corners were cut. New coolant hoses were used though. The necessary holes were present and tapped on the new engine. I unfortunately did not take pictures of alot of this. BUT be advised, when installing the factory oil cooler you will need the cooler assembly itself, the 2 hoses, the plug bolt off the K20 and the small nipple/fitting that circulates the coolant on the exhaust side of the engine. All these parts were culled from the old engine.
    Important note: before installing the plug bolt on the K24 there is an 8mm allen head plug that needs to be removed!!! This plug blocks off the coolant galleys on the back side of the engine and whose removal is necessary for the coolant to circulate through the oil cooler. I asked a few people about this and with some apprehension, loaded up the Vise Grips on the K24 oil filter stud. Once I clamped the pliers on there was no going back. The sigh of relief when the stud broke free and threaded out. I was wary about this step because on the K20 the oil filter stud (it has to have a real name, but this is all I can think to call it)has a proper hex at its base so it can be removed with a deep well socket. The K24 has no such provision, to attempt to remove it is to damage the threads.

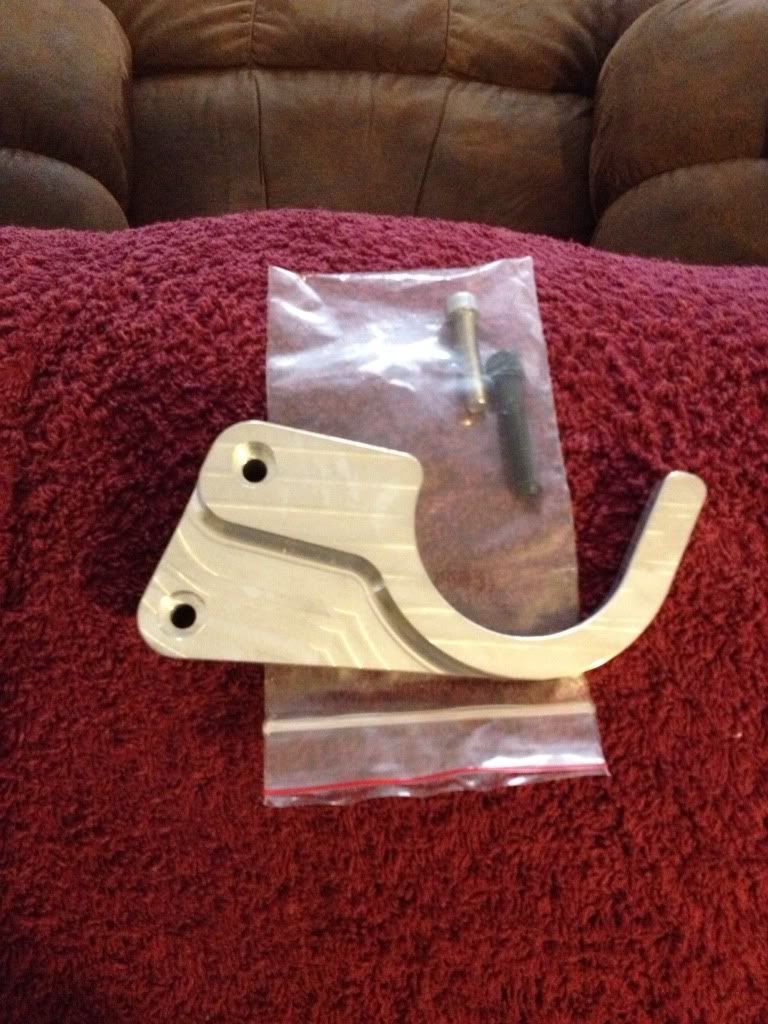
    Another small addition was the install of a lower timing chain guide.


    I felt this particular piece was an important add on for the upcoming cam upgrade.
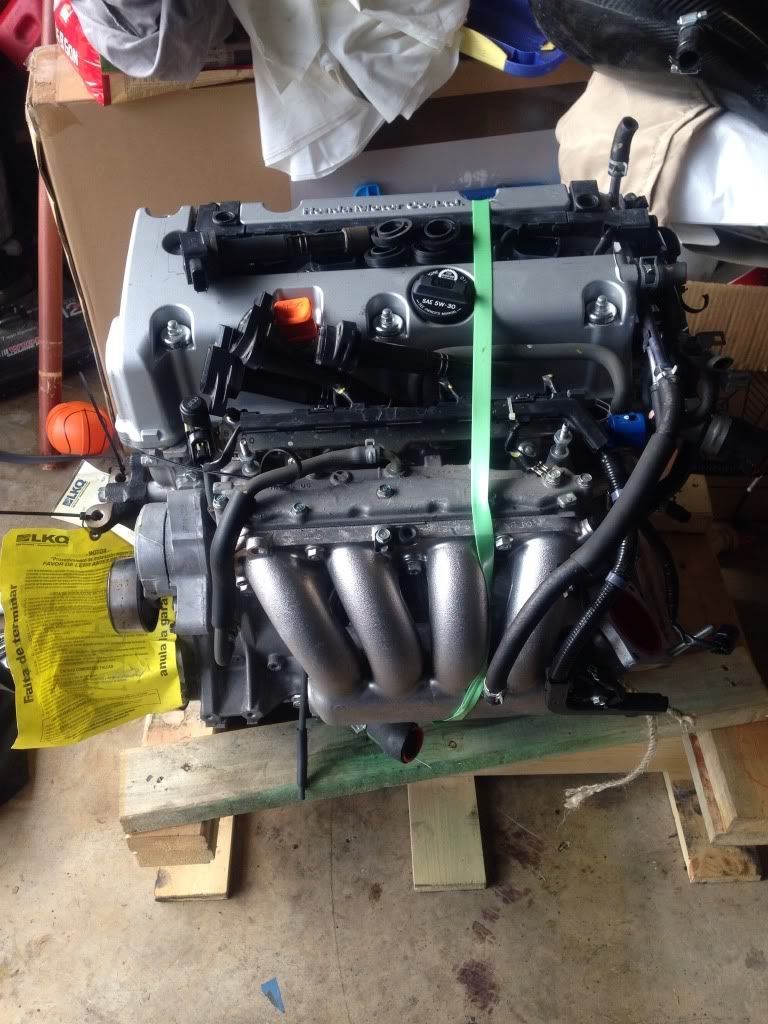
    Removing the front cover also revealed a very clean engine. Very light gold tinting and zero sludge, varnish or unusual slur.
    Now I debated on this for days. I ultimately opted to run the stock K24 oil pump.
    I may eventually swap in the K20 pump/baffle/aluminum pan, but for the time being, my main concern and objective was a simple one: confirm a healthy RUNNING engine before all else. I chose caution over the ease of installing these parts now rather than later. Oh well busting knuckles is part of the hobby...

    Next up was the sensors. I swapped over all except for the knock sensor under the intake manifold.
    Crank position, oil pressure, 2 cam angle and the other random sensor just below the exhaust cam angle sensor were swapped. I read conflicting threads about the K24/K20 knock sensors. I opted to stay with the one on the K24.

    A fresh valve cover gasket, new spark plugs using the K20 heat range and the 50* VTC were installed.

    Lets see, what else...
    Installing the water pump/housing as a whole was a straight forward swap. It bolted right up no issues. I used a fresh tube of Hondabond for all sealing surfaces.
    I used the belt tensioner off the K24 as it was newer and felt tighter and more tensioner...ee than my older one.
    The alternator bolted right up, no fitment issues, no shimming needed.
    The a/c compressor bolted right up as well but was installed AFTER the engine went in. We dropped the engine using a cherry picker and wanted minimal things knocking around.
    Last edited by tinman5; 11-01-2013 at 07:41 PM.

  3. #3
    Registered User
    Join Date
    Dec 2010
    Location
    Texas
    Posts
    566
    I was hoping my CC stage 1 clutch would have enough meat on it to last through the holidays. I will be installing an lsd (finally) with my year end bonus. Would have liked to do this while the engine was out of the car, but unfortunately, after pulling an engine out of my ass, there was no lsd hiding up in there.
    There was however a CC stage 2 clush kit wedged up next to my prostate. It felt kinda good pulling that out...just sayin'...
    This is my second Competition Clutch kit and I say without hesitation, it will not be my last. Outstanding products, very well packaged/presented, complete kit including throwout bearing, alignment tool and pilot bushing.
    Pedal feels great, only slightly firmer than stock and the full face disc is very easy to drive. Still breaking her in, but this clutch holds fantastically. My old stage one was already wearing into its last millimeter of meat so I chose not to risk a clutch swap prematurely.

    I installed new Innovative mounts in the 60A flavor. I retained my old front mount and Ingalls dampener though. I will be replacing the front mount with a matching Innovative piece when the gearbox is dropped for the lsd install. Not neccessary but I prefer the matched set. The new motorset dropped right in with the usual fight at the tranny mount. My DCRH bolted up with minimal hassle. Clears everything for the most part however there is some clearancing of the heat shielding needed. I still have a slight rattle just at 3000rpm's that I will tackle this weekend.

    The coolant side of things prompted a delay. First, I had to use the K20 thermostat (new) and housing. The K24 housing cocks the thermostat to a weird angle that will not allow the use of the stock lower hose. I used the metal pipe off the K24 with a slight kink at the transmission end. The K20 piece sat (also) at an awkward angle and simply was not workable.
    I chose to not use the RBB intake manifold so the coolant port in the head was tapped (3/8" NPT tap and a slight bore of the hole to accommodate the tap) I worked slowly and used a shop vac to remove as much of the shavings as possible. I thoroughly greased the drill bit and worked slowly. Maybe not the best way, but the only way I could think of.
    The heater hoses were replaced as well. Be advised, one of the hoses steps down in diameter. It begins at 3/4" and reduces to 5/8". My stock hoses were the originals and one had started to show signs of leakage. New it is. I used off the shelf 5/8" heater hose for this. I found a metal 3/4 to 5/8 reducer at Advance Auto Parts and that resolved that issue. For the other 2 piece hose I ordered a new elbow from Honda (the small right angle that comes out of the firewall) and off the shelf hose for the rest. It is said the OEM hoses are adequate in length but a quick test fit using my old hoses did not instill too much confidence. Everything now sits comfortably with a little slack, no tension on any of the hoses.
    Up front, the stock EP radiator hoses were used. The lower hose needs a little trimming at both ends for a proper kink free fit.
    So this us where we are at


    I attempted to fit the RBC manifold but simply did not have it in me to deal with the hood clearance. This was coming up on 8am of an all nighter. I am running the PRB manifold and everything fits very well. I had to run the McGuyver intake for a couple days while I hunted down a stock intake elbow. The PWJDM Power Chamber is now on. I am going to attempt another go with the RBC this weekend now that things are back to normal and I am well rested. Probably add a few pictures as well.

    This is not a write up by any means, but if someone can draw something useful from my experience, or if others with first hand input or suggestions by all means contribute. For those on the fence about this engine or even the swap itself, ask away. I cant give you all the answers but I will share my straight forward experience. Keep in mind though, this is NOT a Frank swap. I chose the straight up A2 205hp engine. I cant comment on the hybrids as I honestly know nothing more than I have read.

  4. #4
    Registered User
    Join Date
    Dec 2010
    Location
    Texas
    Posts
    566
    And a couple of smaller details. Use the K24 oil dipstick. The engine is taller so obviously the dipstick is longer.
    I replaced both crankshaft seals, front and rear with OEM seals. The Felpro seals are fine and all if you are in a pinch, but the OEM seals noticeably wider and (strangely) in stock and only $16 for the pair.
    I had replaced my serpentine belt and radiator hoses a year ago with new Gates pieces so I reused both although now that fitment is confirmed I picked up some new Samco radiator hoses for a little under hood bling. As far as the belt goes, I am running NST aluminum pulleys. Once ignition timing was determined to be spot on the crankshaft pulley was re-used. The alternator already had the pulley installed and was not messed with during the swap. The belt itself though is that of an FA/FG Civic Si.
    My trusty ACT Pro/Ultra light flywheel was retained. I was a bit skeptical about this and had sourced a Type R flywheel should the lightness affect drivability in a negative way. Let me say that is a non issue. The throttle response is sharp, very crisp, and coastdown is actually better than on the K20. The bigger engine winds up very quick but does not rev down (comparatively speaking) as sharply as the K20. I am sure once the a/c compressor is hooked up that will change but I still dont feel the lightness will affect the K24 as severely as the K20.
    I was able to retain my Tanabe bar by simply bending back the throttle cable bracket that used to sit right below the bar. I could have removed it but what the hell. I can't quantify any performance benefit, but it's purty and it's a shade of red. That automatically makes it a keeper.

  5. #5
    Registered User USAF EP3's Avatar
    Join Date
    Nov 2009
    Location
    Pinellas Park, FL
    Posts
    886
    What hood clearance problem are you running into with the RBC?

    I feel like you had more trouble with this swap than what is merited. I helped a previous friend do this exact same swap to his '05 EP and it was an extremely straightforward swap. We used an uncut RBC manifold and it cleared the hood with no problems. The RBC was on the previous engine as well so the radiator support was already banged up to accommodate it.

  6. #6
    Registered User
    Join Date
    Dec 2010
    Location
    Texas
    Posts
    566
    Not a real problem per say. As I mentioned I was working on this most of the day and literally all night. I was beat. Everything went in rather smoothly, plugged in or otherwise bolted up. Unfortunately my T bar is a bit mangled. The lower support is/was bent upward a good inch. I straightened it out as best I could, now that I have had a chance to properly re-align everything, for the most part, I dont see too much more work than tapping down the brake booster nipple and removing some of the insulation from the front part of the hood.
    With the exception of a jacked up T bar and sleep depravation, I dont think I encountered any more nor any less obstacles than any other cats that have done this. And the only real help I had was my friend helping me set the engine before tending to his family. It was just me, some Vitamin Water and old school gangster rap.
    And some powdered doughnuts.
    Last edited by tinman5; 11-01-2013 at 08:53 PM.

  7. #7
    Registered User
    Join Date
    Dec 2010
    Location
    Texas
    Posts
    566
    The good thing is I eliminated the intake studs. It takes literally 15 minutes to pull the manifold now.

Thread Information

Users Browsing this Thread

There are currently 1 users browsing this thread. (0 members and 1 guests)

Bookmarks

Posting Permissions

  • You may not post new threads
  • You may not post replies
  • You may not post attachments
  • You may not edit your posts
  •