Credit goes to New Hirunworn on Facebook Ephatch group, as his DIY inspired me to do mine.
People on FB seem very interested in clean USB car charger installation, so here I am.
Like my spoiler mod before, all you need to do is keep reading, then you will know things required to buy in order to complete this DIY.
First, you will need a USB car charger. It can be any brands of car charger, just make sure you don't buy those dual charge adapter (like cig lighter + USB charger), because you are not going to fit one on where OEM cigarette lighter sits.
You can choose amps of your liking. There are usually 1amp or 2.1amp of USB car charger in the market (larger amp = faster charging speed).
I have one 1amp Xtreme USB car charger with me, so I used it for this mod. Here is a link to show you the product (this one is a newer 2.1amp charger):
http://www.adorama.com/XC88002.html
It comes with a blue indicator light, consider that as a little upgrade on interior lightening.
Let's work on re-wiring first.
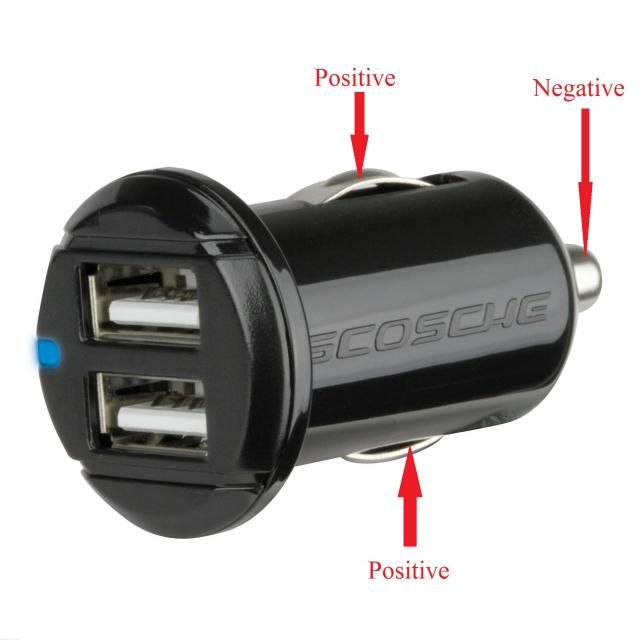
Carefully disassemble the car charger. Then, find + and - on the chip (too bad I forgot to take a picture of disassembled charger before I did re-wiring), positive is usually a thin red cable connects to one of the metal tips on the side, and negative is usually the one with a spring attached.
A picture to illustrate my description:
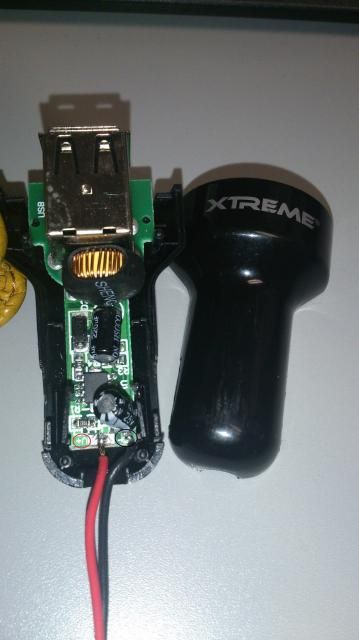
Cut the thin cable and soldering iron the spring away from the chip (don't pull! You might destroy something in the process!). Then, replace those two spots with longer cable of your choice (I used one red and one black cable from computer cooling fan)
Here is what the re-wiring should looks like:
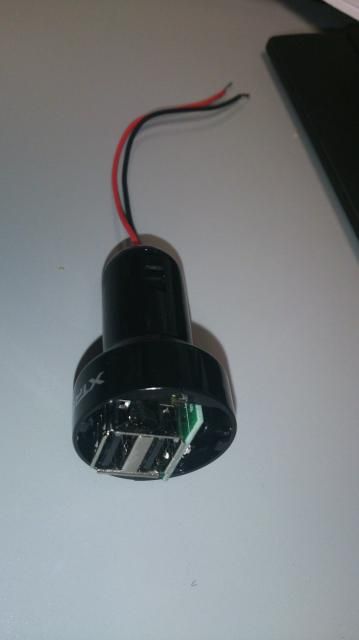
I don't like the chip being exposed, so I put it back inside the housing after re-wiring:
Alternative way to do this: if you don't want to disassemble the USB charger, you can soldering iron cables on those metal tips directly instead.
Rewiring is done. Let's move on to cigarette lighter removal.
Pull this part out from your EP:
Do whatever to remove the cigarette lighter. I literally destroyed mine to take it out...until I figured out that you can actually spin the metal part a little bit to remove the whole assembly. Ahhh damn shame.
This hole should be big enough for Scosche car charger, but a little bit too small for my Xtreme charger...
so I used rotary tool to make that hole bigger. Make sure you test fit the hole frequently so that your charger can fit perfectly.
Yeah, I messed up the surface a little bit during the process...but since the charger sits so low in the car, nobody would notice it anyways...
Now, let the charger sits on the hole and adjust the fitment to the way you like, then hot glue the assembly (yup, one more reason for you to reuse charger housing, because you don't want to hot glue the chip by accident):
Next, find the cigratte lighter cable. The one with yellow/green cable is positive (vertical part of the connector), while black cable is negative (horizontal part of the connector)
Then, you can either follow my way and put two of these at the end of the cables:
OR
use fast connector to tap the cigratte lighter cable. However, I prefer my way because it's easier to remove if you need to replace the charger (or put the OEM cigratte lighter back).
Connect re-wired lighter with the cigratte lighter connector:
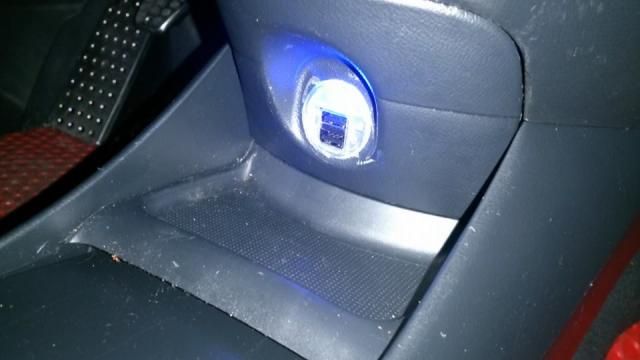
Put the housing back and you are done!
FYI this is not the only way to wire the USB charger. If you are a smoker or need that cigratte lighter for any reason, you can install the charger on that useless circle spot on the dash like what New Hirunworn did. Please contact him for questions if you want to follow his way to DIY your USB car charger.
Thanks for reading my DIY!






 Reply With Quote


Bookmarks